输入输出
文件读写
创建文件对象:
fp = open(file_name, mode='r|b', encoding=None, buffering)  # === io.open
# os.open底层IO接口
access_mode:访问模式。文件打开模式决定读写内容是文本(默认)或字节序列。
a:追加模式,如果文件不存在将自动创建。
close:可使用with语句实现自动管理文件资源。
文件对象
| 属性 | 描述 |
|---|---|
file.closed | 如果文件已被关闭返回true,否则返回false。 |
file.mode | 返回被打开文件的访问模式。 |
file.name | 返回文件的名称。 |
file.softspace | 如果用print输出后必须跟一个空格符,则返回false。 |
文件读写
readreadlineswritewritelinesseektell;
fp.readline()返回结果包含换行符“\n”;
fileinput基于行读取文件:
import fileinput
with fileinput.input(files=('data.txt',)) as file:
  for line in file: print(line)
内置库filecache,你可以用它来指定读取具体某一行,或者某几行,不指定就读取全部行。
import linecache
content = linecache.getline(filename, lineno)  # 行号从1开始,0返回空行
content = linecache.getlines(filename)
输入输出对象
提供类似文件读写的接口读写内存缓存空间的数据,包括基于文本io.StringIO和基于字节io.BytesIO的输入输出对象。
str_buffer = io.StringIO(initial_value='')
bytes_buffer = io.BytesIO(initial_bytes=b'')
文件类型支持
gzip
gzip模块提供 GzipFile 类和 open()、compress()、decompress() 几个便利的函数。
GzipFile 类可以读写gzip格式的文件,还能自动压缩和解压缩数据,这让操作压缩文件如同操作普通的文件对象一样方便。
gzip.open(filename, mode='rb', ...)
对于二进制模式,这个函数等价于
GzipFile构造器:GzipFile(filename, mode, compresslevel)。
gzip.compress(data, compresslevel=9)
gzip.decompress(data)
XML
import xml.etree.ElementTree as xml
root = xml.Element("users")
标准输入输出
读取一行输入字符串。
line = input("Press [enter] to continue.")
输入密码:
import getpass
p=getpass.getpass(prompt='Password: ')
使用print打印对象的文本表示 str(x)(__str__())。如果要格式化输出,通过str.format将输出格式化为字符串,再通过print输出字符串。
print(value, ..., sep=' ', end ='\n', file=sys.stdout) # 支持多个参数连续输出
print("... %{0:s} ... %{1:d} ...".format('Zara',21))
Python 2.x:
print "... %s ... %d ..." % ('Zara', 21)。
警告信息
生成警告信息
import warnings
warnings.warn(message,category=UserWarning,stacklevel=1,source=None)
stacklevel用于指定显示触发告警语句的层级,1表示warn语句所在行,2表示warn语句的上一级调用。
source:*if supplied, is the destroyed object which emitted aResourceWarning.*通常没用。
warn告警信息给出的行号总是在调用warn的位置,因此不能准确反映代码中触发告警的位置。使用warn_explicit()可以指定代码行号。
warnings.warn_explicit(message, category, filename, lineno, module=None, registry=None, module_globals=None, source=None)
警告类型
Warning:所有警告类型的基类,继承自Exception。UserWarning是warn()产生警告的默认类型。DeprecationWarning和FutureWarning分别用于告知开发者和最终用户相关特性将被弃用。
SyntaxWarning/RuntimeWarning/ImportWarning/UnicodeWarning/BytesWarning/ResourceWarning...。
警告信息筛选
每条告警信息按尝试依次匹配筛选规则,当匹配到规则,则按该规则的处理方式处理告警1。告警筛选规则包括:
action:警告的处理方式;"always":总是打印警告;"default":打印首次出现的匹配警告(不同的module+lineno);"module"打印模块内首次出现的匹配警告(不同的module);"once":仅打印一次匹配的警告;"error":将警告转换为异常;"ignore":从不打印警告;
message:匹配警告信息的正则表达式(大小写不敏感);category:匹配警告类型的类名(Warning的子类);module:匹配触发警告信息的模块名的正则表达式(大小写不敏感);lineno:匹配触发警告的行号(默认0匹配任意行)。
如果一条警告信息未匹配到筛选规则,则按默认处理方式处理。
设置警告规则列表
使用环境变量PYTHONWARNINGS(使用,分隔规则)、Python解释器-W选项(多次提供设置多个规则)设置,首次导入warnings模块时加载这些设置。一条规则的声明语法为
action:message:category:module:line
如果某个参数未提供,则:之间为空;如果字段数不足则对应参数值为空。Python内置了部分告警过滤规则,通过上述方法可覆盖这些预置规则。
warnings.filterwarnings(action,message='',category=Warning,module='',lineno=0,append=False)
warnings.simplefilter(action,category=Warning,lineno=0,append=False) # 不匹配message和module
append=False:默认将规则置于最前端。
临时设置警告规则
with warnings.catch_warnings():
    warnings.simplefilter("ignore")
    states_contains_warning()
日志
产生日志
产生日志的方法:debug(), info(), warning(), error(), critical(),对应了相应的日志等级DEBUG, INFO, WARNING, ERROR, CRITICAL,默认等级为WARNING。
全局日志生成器
import logging
logging.warning('Watch out!')  # print to console
root_logger = logging.getLogger()
Logger
日志生成器(Logger)包含一名称用于区分日志来源,推荐基于模块级别构造日志生成器(使用.命名区分层级)。
logger = logging.getLogger(name=__name__)  # default is root
logger.setLevel(level)   # effective level
logger.warning(msg)      # error/exception/warning/info/debug/trace
属性:level(日志级别)、name(日志器名称)。日志生成器会默认将消息传递给全局生成器(意味着会在生成两次日志并发送到相应目标),如果这一行为并非期望的方式,令logger.propagate=False禁止传递消息。
处理日志
日志处理方法包括:打印至控制台(StreamHandler,默认输出流为标准错误输出sys.stderr),存储到磁盘文件FileHandler。
配置全局日志处理方法
logging.basicConfig(filename='example.log', encoding='utf-8', level=...)
basicConfig()需要在产生日志的方法前调用。
自定义配置日志处理方法
Handlers类型将日志发送到指定的目标。可以为一个日志生成器添加多个日志处理器,从而将日志送至不同目标(默认添加了全局的日志处理方法,即输出到stderr)。常用处方法类型:FileHandler、RotatingFileHandler、TimedRotatingFileHandler、SocketHandler、DatagramHandler、SysLogHandler、NTEventLogHandler、QueueHandler
handler = logging.FileHandler(filename,mode='a',encoding=...) # mode可为追加(a)或清空(w)
from logging import handlers   # 更多的处理方法在handlers模块中
handlers.TimedRotatingFileHandler(filename, when='h', interval=1,...)
# TimedRotatingFileHandler按时间区间轮换
# RotatingFileHandler按文件大小轮换,适用于多个进程向文件写数据。
when:时间单位包括S秒;M分;H时;D天;W0-W6周(大小写不敏感)。
logger.hasHandlers()可查看日志生成器是否配置了处理方法;使用logger.handlers查看其直接处理方法。如果日志生成器的属性propagate=True,则该日志生成器还会将日志传递上级日志生成器(logger.parent,默认为root)。
handler.setLevel(level)    # handler需要处理的最低日志级别
logger.addHandler(handler) # logger.removeHandler() => logger.handlers
logger.addFilter(filter)   # and Logger.removeFilter()  => logger.filters
# addFilter() and removeFilter()
日志格式
logging.basicConfig(format='[%(asctime)s] - %(levelname)s: %(message)s',
                    datefmt='%Y-%m-%d %H:%M:%S')
%(name)s:日志发生器名称;%(asctime)s:输出日期时间(格式参考time.strftime());%(message)s:日志消息;%(levelname)s,%(lineno)d,%(funcName)s,%(process)d……
Formatter
handler.setFormatter(
	logging.Formatter(fmt=None, datefmt=None, style='%|{|$')
)  # 设置格式化方法
配置日志
- 分别创建并配置日志处理流程的各个对象;
- 读取日志配置文件
fileConfig('log.conf'); - 读取包含配置信息的字典
dictConfig(),可从JSON或YAML文件读取配置信息。
Logging HOWTO — Python 3.9.5 documentation
Logging Cookbook — Python 3.9.5 documentation
How to Collect, Customize, and Centralize Python Logs | Datadog (datadoghq.com)
logging — Logging facility for Python — Python 3.9.5 documentation
对象输出
格式化对象输出
Python内置pprint模块,支持将对象的数据成员序列化为JSON对象并格式化输出(提供缩进),默认输出到标准输出(stream=None)。
from pprint import pprint
pprint(object, stream=None, indent=1, width=80, depth=None, *, compact=False)
使用rich模块能够利用现代终端特性,提供输出内容的风格设置(斜体、加粗、颜色、高亮等)。
from rich import print  # as rprint
print("[italic red] Hello[/italic red] World!", locals())  # 替换系统print函数
from rich import pretty
pretty.install()  # 自动格式化Python命令行回显的对象。
from rich import inspect
inspect(obj, methods=Ture)  # 格式化输出对象成员信息
在notebook中首先执行
%load_ext rich,在Jupyter Notebook中通过display方法使用rich。
数组输出
设置打印选项:
np.set_printoptions(
  precision=8,  # number of digits after "."
  linewidth=75,
  nanstr=None, infstr=None,
  suppress=False, formatter=None, sign=None, floatmode=None)
表格输出
Pandas设置打印宽度等参数:
pd.set_option('display.width', 80)        # 每行显示字符数
pd.set_option('display.max_columns', 40)  # 最多显示的数据列数
pd.set_option('display.max_rows', 60)     # 也适用于Jupyter Notebook
width和max_columns需要同时设置才有效。
设置数值显示精度:
with pd.option_context('display.precision', 2):
  print(df)
进度条
click.progressbar
tqdm
安装:
conda install -c conda-forge tqdm # pip install tqdm
用法:
from tqdm import tqdm, trange
for char in tqdm(iterable):
    sleep(0.25)
for i in trange(100): sleep(0.01)
with tqdm(total=10, desc='TaskName',unit='it') as pbar:   # => pbar.close()
   for i in range(10):
      tqdm.write("task in progress ...")
      sleep(1)
      _ = pbar.update(n=1)  # True if a `display()` was triggered.
desc值当进度条左侧显示的信息;unit指定在进度条右侧显示的速率单位。tqbar.set_description(desc=None, refresh=True)
防止进度条重绘
直接在进度条循环中添加输出语句(print)会导致进度条重复绘制(内容会粘连到之前绘制的进度条后面),可使用tqdm.write来输出信息(清除之前的进度条并输出信息,然后在下一行重绘进度条)。如果迭代过程中调用第三方库输出内容,可以首先将标准输出和错误输出重定向到tqdm。
import sys, contextlib, tqdm, time
from tqdm.contrib import DummyTqdmFile
@contextlib.contextmanager
def std_out_err_redirect_tqdm():
    orig_out_err = sys.stdout, sys.stderr
    try:
        sys.stdout, sys.stderr = map(DummyTqdmFile, orig_out_err)
        yield orig_out_err[0]
    except Exception as exc:
        raise exc
    finally:
        sys.stdout, sys.stderr = orig_out_err

with std_out_err_redirect_tqdm() as orig_stdout:
  pbar = tqdm(total=100, file=orig_stdout, dynamic_ncols=True)
  for i in range(100):
    time.sleep(1) # internal messages
    print(f'progress to {i}')
    print(f'progress to {i*10}')
    _ = pbar.update(n=1)
  pbar.close()
图形界面
import tqdm.gui
tqdm.gui.tqdm(total=100, desc='Progress')
用于Apply|Map操作
tqdm.pandas(desc)
df.progress_apply(...)     # similar to apply()
df.progress_applymap(...)  # similar to applymap()
alive-progress
安装:pip install alive-progress。
from alive_progress import alive_bar
with alive_bar(total=100, title='Task') as bar:
    for i in range(100):      # iterate as usual
      sleep(1)
      bar()                 # call after consuming one item
title:显示在进度条左侧。
数据交换
对象序列化
JSON对象序列化
将Python对象转为为JSON描述的字符串形式,并写入文件;或从文件读取JSON字符串并转换为Python对象。
json.dump(obj, fp,..., ensure_ascii=True,indent=None,
          default=default_func, cls=custom_encoder)
obj = json.load(fp,...)
ensure_ascii=True则将非ASCII字符传唤为Unicode转义序列,如\u9ed8\u8ba4;反之则使用UTF-8编码文本,文件也应该使用UTF-8编码打开。
indent:如果为None,则不会换行;反之,按给定数量缩进各层级内容;
dumps和loads在对象和字符串之间转换。
默认编码类JSONEncoder支持转换的Python类型包括:
| Python | JSON |
|---|---|
dict | object |
list/ tuple | array |
str | string |
numeric(int,float) | number |
True | true |
False | false |
None | null |
对于JSONEncoder不支持的类型,可通过自定义default方法或继承JSONEncoder并重写default方法。例如,将任意迭代类型转换为list,或者将np.int64转换为int。
def default(o):
  try:
    iterable = iter(o)
    return list(iterable)
  except TypeError as e:
      raise e
def MyEncoder(JSONEncoder):
  def default(self, o):
    pass
不完整的JSON对象解析
YAML
安装
pip install pyyaml
python setup.py --with-libyaml install  # install with lib
使用
import yaml
try:  # use LibYAML based parser and emitter
    from yaml import CLoader as Loader, CDumper as Dumper
except ImportError:
    from yaml import Loader, Dumper

data = yaml.load(stream, Loader=Loader)
output = yaml.dump(data, Dumper=Dumper)
marshmallow
marshmallow: simplified object serialization, converting complex datatypes to and from native Python datatypes.
marshmallow使用Schema约束对象的序列化和反序列化时的==数据类型==(相比json无类型验证)。Schema定义的字段对应于对象的成员变量/属性或是字典的元素。
from marshmallow import Schema, fields
class ArtistSchema(Schema): # 使用静态成员来定义Schema
    name = fields.Str()
class AlbumSchema(Schema):
    title = fields.Str()
    release_date = fields.Date()
    artist = fields.Nested(ArtistSchema())  # 嵌套定义
album = dict(   # 要序列化的对象可以是字典或是对象(特别地,数据类对象)
  artist=dict(name="David Bowie"),
  title="Hunky Dory",
  release_date=date(1971, 12, 17)
)
schema = AlbumSchema()
result = schema.dump(album)  # -> Python字典
result = schema.dumps(album)  # -> JSON文本
Quickstart — marshmallow 3.11.1 documentation
pickle
The
picklemodule implements binary protocols for serializing and de-serializing a Python object structure.The
picklemodule is not secure. Only unpickle data you trust.
pickle.dump(obj, file, ...)   # write an object to file stream
obj_bytes = pickle.dumps(...) # return bytes array instead of writing to file
file:打开的文件对象。
a = pickle.load(file, ...)
a = pickle.loads(bytes_buffer, ...)
pickle编码的数据与代码相关,不同Python版本间可能存在兼容性问题。
pickle编码速度较慢。
cloudpicke
cloudpickle支持序列化pickle模块不支持的Python数据结构,尤其是支持==函数对象==,因此可以将代码保存并传递到本地或远程的其他进程。cloudpickle提供与pickle相同的接口。
marshal
marshal不能用于序列化用户自定义类型对象。
The
marshalmodule exists mainly to support reading and writing the “pseudo-compiled” code for Python modules of.pycfiles. Therefore, the Python maintainers reserve the right to modify the marshal format in ==backward incompatible== ways should the need arise. If you’re serializing and de-serializing Python objects, use thepicklemodule instead – the performance is comparable, version independence is guaranteed, and pickle supports a substantially wider range of objects than marshal.
How to pickle a python function with its dependencies?
shelve
A “shelf” is a persistent, dictionary-like object, where the values in a shelf can be essentially arbitrary Python objects that the
picklemodule can handle. including most class instances, recursive data types, and objects containing lots of shared sub-objects. The keys are ordinary strings.shelve — Python object persistence — Python 3.10.7 documentation
导入导出数据
使用NumPy/SciPy
保存数组数据为二进制文件(默认以.npy作为扩展名)。
np.save(file_name, array, allow_pickle=True, fix_imports=True)
array = np.load(file_name)	# 加载数组或pickle对象。
序列类型也可以进行保存,Numpy会自动将其转换为
ndarray。
保存多个数组
np.savez(file, arrays, kw_arrays) # save as '.npz' format
使用关键字参数可以关键字作为数组名一并保存;反之,数组将按'arr_0', 'arr_1'的方式依次命名。
npz文件格式是一个由数组对象对应的npy文件组成的档案文件。使用savez_compressed将档案文件进行压缩。
同样使用np.load读取npz文件并返回一个NpzFile对象,可访问其中包括的数组对象。
arrays = np.load(file)
var_names = arrays.files  # 获取包含的数组名
arr = arrays[var_name]    # 读取数组
保存数组为文本文件
==仅适用于1D或2D数组==。
np.savetxt(fname, array, fmt='%.18e', delimiter=' ', newline='\n', header='', ...)
array = np.loadtxt(fname, dtype=<class 'float'>, delimiter=None,...)
array = np.genfromtxt(fname, dtype=<class 'float'>, delimiter=None,...)
fmt中可以添加固定字符,例如添加\n以强制换行。
newline为插入到两行之间的分隔符(默认\n);
genfromtxt增加了处理缺失数据的选项。
保存稀疏数组
from scipy import sparse
sparse.save_npz(file_path, matrix)
matrix = sparse.load_npz(file_path)
使用Pandas
Pandas提供读取多种格式的数据的方法:包括CSV、EXCEL、JSON、数据库等。pd.read_csv/read_json()和pd.DataFrame.to_csv/to_json()可读取文件或IO文本缓存对象。
# 适用于转换命令行输出的表格型数据
df=pd.read_csv(io.StringIO(output))
CSV
data = pd.read_csv(
    "D:/DataSets/NSL-KDD/KDDTrain+.txt", header='infer', index_col=None, escapechar="\\")
header:默认将第一行作为表头header=0,没有头部的CSV文件应该设置header=None(将生成默认数组编号表头);names:代替从文件中读取的表头;index_col:设置作为行索引的列名,设置多个列名以生成MultiIndex;usecols:指定要读取的列;dtype:指定数据类型,使用字典单独指定某列类型;skipinitialspace:==跳过分隔符后的空白字符==。quotechar:引号字符用于包含字符串,对字符串中的分隔符转移;doublequote将两个连续引号字符视为一个引号元素。escapechar:转义字符,可以消除任何字符可能具有的特殊含义(\n、\t等代表特殊控制序列,直接转换为字母),主要用于消除引号的特殊意义。不仅限于使用引号字符的字符串,任何字段中包含转移字符都有效。 分隔符sep|delimiter:sep=','(默认);\s+空白,==用于处理以空格或\t分隔的数据==;长于1个字符将被视为正则表达式(强制使用Python解析引擎);delim_whitespace=True用于指定空白作为分隔符。lineterminator:只有选择'C'解析引擎才可用。encoding=utf-8:文件的编码方案,其他包括:gb18030。skiprows=N|[i,j,...]|func:跳过文件中的行,先于读取表头(即跳过的行包含表头)。如果参数为列表,则跳过指定行,如果为整数则跳过相应行数。如果为函数,则函数根据输入行号计算是否跳过对应行,如:
lambda i: i>0 and i<=100(跳过除第一行之后的100行)。lambda j: i%2==0(跳过奇数行)。
error_bad_lines:warn_bad_lines:comment:注释行开始符号。
日期解析选项:
parse_dates:bool|List[str]|List[int]|dict{'name': List}:指定是否解析日期以及解析日期的列名/编号;使用字典表示使用多列的值拼接后进行解析,并将解析后的值以字典键名作为列名输出。infer_datetime_format=False:自动推测日期格式。keep_date_col=False:如果是使用原数据的多列拼接解析,是否保留原数据。date_parser=dateutil.parser.parser:解析日期的函数。day_first=False:日期格式为DD/MM。
读取excel文件需要openpyxl库支持。
输出:
df.to_csv("path/to/file.csv", header=True, index=True, columns=None, float_format='%.2f', sep=',', na_rep='', )
使用
columns参数指定导出的列。
quotechar(默认为")、doublequote=True、escapechar=None
JSON
pd.read_json(path_or_none, orient='records', dtype=True,
	convert_dates=True, keep_default_dates=True, date_unit=None,
	encoding='utf-8', encoding_errors='strict',
	compression='infer', # 'infer', 'gzip', 'bz2', 'zip', 'xz', None for no compression
	lines=False, chunksize=None, nrows=None, # refer to pd.read_csv()
	storage_options=None   # e.g. http://user:passwd@host/path/file.json
)
orient:导出数据格式。
-
'split':=>{'index':[...],'columns':[...],'data':[...]},分别存储索引、列名和数据(矩阵); -
'values':仅存储数据矩阵(split的数据矩阵); -
'index':=>{'index':{'column':value,...},...},按==行索引==存储记录,每条记录都包含列名;-
'columns':=>{'column':{'index':value,...},...},按==列存储==,每列都包含索引名; -
'records':=>[{'col1':val1,...},...,{'col2':val2,...}],使用列表存储记录,不存储索引; -
'table':{'schema': schema, 'data': data}。data结构和records输出结构相同(包含index);{ "fields": [{"name": name, "type": type},...], "primaryKey": ["index"] }
-
dtype:默认自动推导数据类型,如果为字典则使用指定类型;
convert_dates:默认将类似日期的列转换为日期类型数据(datetime64[ns]);如果为列表,则只对指定列进行转换;
keep_default_dates:默认尝试转换以'_at','_time'结尾,以'timestamp'开头,或为'modified, date'的字段;
date_unit:默认尝试检测日期的单位;如果自动检测不正确,则可以指定单位为's','ms','us','ns';此处指定的时间单位仅影响读取数据,==不影响转换后日期类型的单位==。
chunksize:分块大小,返回一个迭代对象,每次获取指定数量的记录;
nrows:仅返回指定数量的记录(默认返回全部)。
df.to_json(path_or_none, orient='records',
           date_format='epoch', date_unit='ms', double_precision=10,
           force_ascii=True,  # 不强制保存为ASCII(可使用UTF-8打开文件)
           lines=False,  # for orient='records':输出去掉外层[],每行一条记录
           index=True,   # for orient='split'| 'table'
           indent=4,
           default_handler=str,
           compression='infer', # infer from filename
           storage_options,
          )
date_format:'epoch'表示date_unit单位的时间戳(除orient='table'外的默认值),iso表示ISO8601文本格式(2017-09-30T09:00:00,orient='table'的默认值)。
date_unit:转换后的数值单位('s','ms','us','ns')。
default_handler:对于无法转换的数据结构的默认转换方法。与
to_json()类似的方法是to_dict(),后者仅将数据表转换为Python字典,因此不需要考虑数据序列化的问题,因此没有序列化相关参数。
Parquet
df.to_parqeut(filepath=None, index=None, partition_cols=None)
index=False:不保存索引信息。如果为True则索引被保存为数据列,如果为None,则索引被保存为元数据。==如果未指定分区,则路径为文件;反之,路径为目录名==;如果未指定路径则返回一个bytes对象。Pandas使用
pyarrow库作为读写Parquet文件的接口,使用以下方法可以读取文件的元信息:import pyarrow.parquet as pq pq.read_metadata(file) # 汇总信息 schema = pq.read_schema(file) # 表格字段类型定义 types = [str(t) for t in schema.types] df = pd.DataFrame({'Field': schema.names, 'Type': types})
读取分片数据时可能遇到类型不匹配问题(null schema)。
数据库
Pandas使用SQLAlchemy读取数据库。
sql_engine = sqlalchemy.create_engine(db_url, **kwargs)
df = pd.read_sql(table_or_query, sql_engine, **kwargs)
如果参数为表名则调用read_sql_table,反之调用read_sql_query。
index_col:用作索引的列(str或list);
coerce_float:尝试将非数值(如decimal.Decimal)转换为浮点数类型;
parse_dates:针对源数据为字符串或时间戳,转为日期时间的列名(list)或:
{column_name: format_string}):列名及其对应的变换格式;{column_name: arg_dict}:列名及传递给pandas.to_datetime的选项参数(用于数据库不支持Datetime的情况)
columns:从表中读取的列(仅用于读取表格);
chunksize:如果指定该参数,则返回一个迭代器Iterator[DataFrame]包含指定的行数;
写入数据库(如果表格不存在将自动创建):
df.to_sql(
   table_name,
   con=sql_engine,          # created by SQLalchemy
   if_exists='fail',        # 如果表格存在, "replace" or "append"
   dtype=dict_or_scalar,    # 指定某些列的类型,使用SQLAlchemy定义的类型
   index=True,              # 是否将索引保存为数据库表的列
   index_label=str_or_list, # 指定保存的索引列名称
   chunksize=None           # 每次写入的行数(默认一次全部写入)
)
覆盖表格内容:使用if_exists='replace'将删除并重新创建数据库表。为了==确保数据库表的定义不变==(to_sql生成的表定义可能与人工配置的定义不同),可在写入前先执行TRUNCATE TABLE命令,再使用if_exists='append'进行==追加写入==。
df.to_sql()不支持更新已有数据库表中的记录(因为涉及查找匹配记录的具体逻辑)。
读写配置文件
configparser:Tips and Tricks for Handling Configuration Files in Python | by Ng Wai Foong | Better Programming
python - Pros and cons for different configuration formats? - Stack Overflow
Config Files: INI, XML, JSON, YAML, TOML | BareNakedCoder.com
声音
产生蜂鸣音:
import winsound
frequency = 2500  # Set Frequency To 2500 Hertz
duration = 1000  # Set Duration To 1000 ms == 1 second
winsound.Beep(frequency, duration)
os.system("beep -f 555 -l 460")  # on linux
图形
Matplotlib
matplotlib中,frontend就是我们写的python代码,而backend就是负责显示我们代码所写图形的底层代码。backend分为两类:
interface backend(interactive backend):跟显示到屏幕相关的UI库(需要额外安装);hardcopy backend(non-interactive backend):写入到文件相关的库。
import matplotlib
matplotlib.rcsetup.interactive_bk     # 获取 interactive backend
# GTK4Agg, Qt5Agg, TkAgg, WXAgg, GTX4Cario, Qt5Cario, TkCario, WXCario ......
matplotlib.rcsetup.non_interactive_bk # 获取 non-interactive backend
# agg, cario, pdf, pgf, ps, svg, template
matplotlib.rcsetup.all_backends       # 获取所有 backend
plt.get_backend()          # 获取正在使用的后端
plt.switch_backend('name') # 切换后端
matplotlib.use('Qt5Agg')   # 切换后端, use before import pyplot
不同的后端提供的图形接口可能不同。
绘图窗口(figure)
import matplotlib.pyplot as plt
fig = plt.figure(num=None, figsize=None, dpi=None, facecolor=None, edgecolor=None, frameon=True, clear=False)
figsize:图形尺寸(英寸)[width, height]。
clear:激活图形时是否清除已有内容。
num:可以为整数(fig.number)或字符串(作为图形标签以及窗口标题)。如果没有指定,则自动编号。如果为整数,则窗口编号默认为Figure <num>。==如果指定编号切片对应图形窗口存在,则激活该窗口,反之创建对应该编号的窗口。==可以在相关绘图函数中指定编号以操作对应的图形窗口。
图形窗口创建后默认为隐藏状态,需要调用fig.show()(非阻塞)/show()来显示窗口。
利用各种绘图函数也可以自动创建图形窗口。
绘制子图
在当前图形窗口中创建子图。如果当前没有图形窗口则创建一个。
ax = plt.subplot(nrows, ncols, index, ...,**kwargs)
ax = plt.subplot(pos, ..., **kwargs)
nrows, ncols指定网格大小,index为按行索引的子图序号。index也可以设置为二元组(first,last)表示子图跨列。==当指定的网格大小超出当前图形窗口的网格范围,会清除此前已经创建的子图网格并重新创建;反之,则切换当前子图。==如果只是添加子图,则使用add_subplot()方法。
pos使用三位数字代替nrows, ncols, index(少于9幅子图);
sharex, sharey:所有子图共享坐标轴设置(limits, ticks, scale);
label:子图坐标系的标签;当指定指定坐标子图时默认返回已有子图(如果没有则新创建一个),==如果提供不同标签,则会返回新的子图==。
**kwargs:subplot()方法还接受坐标轴的属性对应的关键字参数。
封装了
Figure.add_subplot(nrows, ncols, index, ...,**kwargs)。
创建一个包含子图网格的窗口:==当所有子图的属性一致时,以及设置窗口属性==,使用该函数更加方便。
fig,ax = plt.subplots(nrows=1, ncols=1,
                      **subplot_kw, **gridspec_kw, **fig_kw)
当只生成一幅子图时,返回的坐标对象ax;当生成1xN或Nx1幅子图时,返回1维坐标对象向量;其他返回MxN坐标对象矩阵。
当不提供行列数(即
nrows=1, ncols=1),subplots等效于先创建图形窗口,再调用fig.add_subplot()。
subplots()不接受pos参数。
获取当前窗口
获取当前窗口,如果不存在图形窗口,则创建一个。
fig = plt.gcf()
部件
显示绘图
plt.show(block=True) # show current figure
block=True:在交互式终端中,显示绘图后阻塞程序,直到绘图窗口关闭。fig.show()不能阻塞程序,当程序退出时,图形窗口将关闭(在图形显示后执行sleep会使图形窗口无响应)。
在非交互模式(ion()/ioff())下,修改图形数据后重绘当前图形窗口。
plt.draw()  # ==> fig.canvas.draw_idle()
plt.clf()   # Clear the current figure
清除图形内容
fig.clear()   # fig.clf() 清除图形内容
ax.cla()  # 清除坐标轴内容
关闭图形窗口
plt.close()
坐标系
除了绘图返回坐标系以外,也可以首先手动创建坐标系。
from matplotlib.pyplot import axes, gca
ax = plt.axes(**kwargs)	# creat an axes and make it current axes.
plt.axes(ax)			      # add an axes and make it the current axes.
获取当前坐标系,如果不存在,则创建一个新的坐标系。
ax = plt.gca(**kwargs) # 参数用于必要情况下创建坐标系
ax.get_figure()  # 获取坐标系所属图片
ax.axis('off')   # hide the axes: ax.set_axis_off()
ax.set(**kwargs)
ax.set_title(label, fontdict=None, loc={'center|left|right'},y)
ax.set_xlabel()  # set_ylabel
ax.set_xlim()    # set_ylim
kwargs中的属性都对应了相应的set_property()方法。plt.property(...)快捷方法等效于调用或ax.set_property(...)使用$\LaTeX$为标签添加数学公式:
bbplt.rcParams.update({
 "text.usetex": True,
 "font.family": "sans-serif",        # serif
 "font.sans-serif": ["Helvetica"]})  # "Times New Roman"
在标签文本中添加行内公式(inline),$\LaTeX$命令需要使用转义字符
$\\beta=0.1$。
设置坐标刻度
默认以图形数据的x,y值作为刻度数值和刻度的标签。当数据点数较多时,可人工设置刻度值和标签,从而减少坐标轴上标记的数量(刻度数值和刻度标签是一一对应的,刻度标签需要在设置刻度后设置(调用ax.set_xticks,ax.set_xticklabels或者plt.xticks等效调用),否则可能会导致标签与刻度错位)。
ax.set_xticks(x, minors=False)           # => set_yticks,
ax.set_xticklabels(labels, minors=False, rotation=50) # set_yticklabels
plt.xticks(ticks=None,labels=None,**kwargs)      # 同时设置刻度值和刻度标签(Text properties)
kwargs为标签文本的属性,包括rotation(逆时针旋转角度)。plt.xticks在未提供刻度和标签参数,但提供属性参数时,更新当前坐标轴刻度的属性。
坐标轴对象提供了刻度常用属性的设置:
ax.tick_params(axis='both|x|y', which='major|minor', labelrotation=...) # 设置刻度及标签属性
ax.ticklabel_format(axis='both|x|y', style='sci', scilimits=(0,3)) # 设置标签格式(科学计数法)
tick_params常用属性包括:
color, labelsize, labelcolor,labelrotation,bottom,top,left,right(是显示某个方向的刻度),labelbottom,labeltop,labelleft,labelright(是否显示某个方向的标签)。
设置网格
plt.grid(color='#95a5a6', linestyle='--', linewidth=2, axis='y', alpha=0.7)
设置图例
ax.legend(fontsize='small', loc='upper left', ncol=2) # 自动设置(plt.legend)
ax.legend(lines, labels, ...) # 指定对应图例
自动设置:1) 在调用相应绘图函数时指定标签(label='line_label');2)通过已绘制的图形部件设置标签(set_label('line_label'));
以下划线开头的标签,将不会自动显示在图例中。
图形部件
折线图
lines = plt.plot([x], y, [fmt], [x2], y2, [fmt2], ..., **kwargs)
lines = ax.plot(...)
使用fmt定义折线格式的颜色、标记和线形,例如--ro;或使用曲线(Line2D)属性作为kwargs(应用于此次绘制的所有曲线),其中:
-
color='green'(或c): -
marker='o':标记类型,常用类型包括:+(加号)、o(实心圆)、*(星号)、.(点)、|_(短划线)、1|2|3|4(三分符号)、x(斜十字)、^|v|<|>(三角形)、s(正方形)、D|d(菱形)、p(五边形)、h|H(六边形),(仅为一个像素点)、8(八边形)、P(加粗十字)、X(加粗斜十字)。 -
markersize=12:标记尺寸; -
markevery=(start,N):当绘图点数较多时,通过该选项减少标记的点数。每N个点标记,从start开始标记(Line2D.set_markevery())。 -
fillstyle:标记填充方式,'full'使用markerfacecolor填充、none不填充; -
linestyle='-'(或ls):线形'-','--','-.',':','',...; -
linewidth=2(或lw): -
label='Line1':折线关联的标签,用于显示图例(ax.legend)。
对数尺度绘图
手动绘图:将坐标值进行对数转换(np.log10);坐标轴刻度值设置为相应的对数转换后的值,坐标轴刻度标签设置为原始数值的表示。
ax = np.plot(np.log10(x), y)
ax.set(
  xticks = np.log10(sub_x), # 选取部分值作为坐标轴刻度
  xticklabels = ['format'.(x) for x in sub_x]
)
使用库函数绘制对数尺度折线图:自动设置刻度和标签格式(默认为指数表示)。
plt.semilogx(x,y,...) # plt.semilogy(...), ax.semilogx(...), ...
plt.loglog(x,y,...) # 横纵坐标均使用对数尺度绘图。
如果需要手动设置刻度标签,为了使刻度均匀分布,刻度值应该是等比数列,标签与刻度值保持一致。
plt.axvline(x) # 垂直线, 水平线 plt.axhline(x)
柱状图
from matplotlib.axes import Axes
bars = ax.bar(x, height, align='center', tick_label=...,
              width=0.8, label=...)
x:柱状图的横坐标;如果x为数值则表示实际位置;如果x为字符串,则位置按序号确定。x的值为默认横坐标标签,使用tick_label自定义横坐标标签。width表示柱形占x两个点之间的间距的比例,align='center'|'edge'为柱形相对x点的对齐方式(默认为中心对齐,edge为靠左边缘对齐)。
xerr,yerr:横纵坐标的值与误差。误差的设置方式:
- 标量:每个柱形的
+/-误差相同; - 向量:每个柱形对应
+/-误差,+/-误差相同; - 矩阵(
2,N):每个柱形具有独立的+/-误差。 None:没有误差线。
使用
barh绘制水平柱形图。此时x为纵轴,y为横轴,但``xerr,yerr`的含义不变。
label:为一个系列数据的标签,用于显示图例(legend)。
颜色选项:color、edgecolor;
线条选项:linewidth、``
堆栈式柱状图
每个条形分为多段,每一段代表一个系列的数据。
通过指定bottom参数来指定各个系列的相对位置。
ax.bar(x,y1,...)
ax.bar(x,y2,...,bottom=y1)
分组柱状图
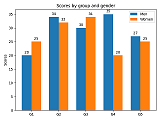 多个系列数据的每个点并列展示。绘图时需要设置每个系列的
x值偏移量,使各系列同一点的柱形并排显示(pandas封装了分组柱状图的快捷绘图方式)。
频数直方图
plt.hist(x, bins, range, density)
如果x是多个序列组成列表,则分别统计并绘制多个直方图。
bins:如果为整数,则指定分组个数,按均匀间隔分组;如果为序列,则指定分组的边界($N+1$);如果为字符串,则应该为:'auto', 'fd', 'doane','scott', 'stone', 'rice', 'sturges', or 'sqrt'(np.histogram_bin_edges)。
density=True:显示频率而非频数。
饼图
ax.pie(sizes, explode=None,
       labels=None, labeldistance,           # 标签及其离中心距离
       autopct='%1.1f%%', pctdistance=None,  # 百分比及其离中心距离
       shadow=False, startangle=0)
explode控制饼图组成部分与中心分离的程度;
autopct:在饼图中显示百分比,并设置百分数格式;
shadow:饼图的立体阴影;
startangle:起始部分的角度(默认为0,即右侧水平位置);
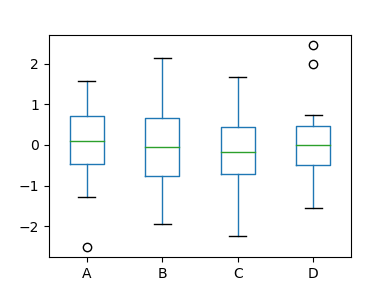
boxplot
hexbin
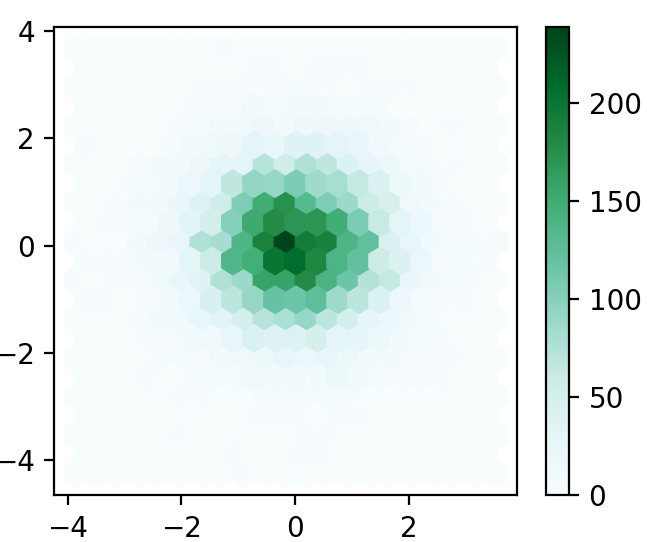 统计二维数据的分布信息。
形状
from matplotlib.patches import Ellipse, Polygon
文本
文本对象在图中的标题、坐标轴标题、图例、刻度标签等使用,需要设置其属性。标签文本的常用属性包括:
text:color:fontfamily={FONTNAME,'serif','sans-serif','monospace'}:math_fontfamily:fontsize|size:fontstyle|style={'normal'|'italic'|'oblique'}:fontweight|weight={VALUE|'normal'|'regular'|'light'|'bold'...}:horizontalalignment|ha={'center'|'right'|'left'}:verticalalignment|va={'center'|'top'|'bottom'|'baseline'|'center_baseline'};parse_math:bool:usetex:bool:None使用rcParams["text.usetex"];rotation={FLOAT|'vertical'|'horizontal'}:url:str
标注
plt.annotate('msg', point)
默认绘图属性
默认绘图属性通过matplotlibrc配置文件、样式表(style sheets)和运行时配置参数rcParams(runtime configuration)确定,优先级按载入顺序依次由低到高。所有运行时配置参数储存在字典结构matplotlib.rcParams中(可通过matplotlib或pyplot来访问)。
plt.rcParams.update({'group.prop': value})   # 单独设置各项属性
plt.rc(group, **kwargs)   # by group: plt.rc('font', size=20)
plt.rc按属性分组(font,lines,axes,figure等)设置当前的绘图属性。
通过
plt.rcParams()获取所有绘图属性的当前值,默认值可通过plt.rcParamsDefault获取;matplotlib.rcdefaults。
临时修改默认属性:
with mpl.rc_context(prop_value_pairs):  # 使用上下文管理器
    plt.plot(data)
@mpl.rc_context(prop_value_pairs)  # 使用装饰器
def plotting_function():
    plt.plot(data)
使用样式表设置默认绘图属性
print(plt.style.available)
plt.style.use('ggplot')  # 使用内置或自定义样式表。
plt.style.use(['dark_background', 'presentation'])
with plt.style.context('dark_background'): # 临时修改绘图属性
    plt.plot(np.sin(np.linspace(0, 2 * np.pi)), 'r-o')
plt.show()
自定义样式表格式与matplotlibrc格式相同,忽略与实际样式无关的rcParams参数。多个样式表(定义不同方面的样式)可进行叠加。
axes.titlesize : 24
axes.labelsize : 20
lines.linewidth : 3
lines.markersize : 10
xtick.labelsize : 16
ytick.labelsize : 16
标题
fig.canvas.set_window_title('title') # Window Title
# fig.canvas.setWindowTitle('title') 无效
尺寸
fig.set_size_inches(w, h=None, forward=True)
fig.set_figwidth(val, forward=True) # set_figheigth()
forward=True自动更新画布。长度单位转换:$1\mathrm{cm}\approx0.39\mathrm{in}$。
窗口状态:最大/最小化
fig_manager = plt.get_current_fig_manager()
# TkAgg backend
fig_manager.window.state('zoomed')
# Qt5Agg: showMinimized, showNormal, showFullScreen
fig_manager.window.showMaximized()
# wxAgg
fig_manager.frame.Maximize(True)
颜色
colormap
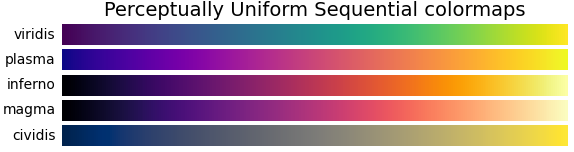
Matplotlib具有一系列内置colormap。
cmap = plt.get_cmap(name) # => matplotlib.cm.get_cmap(name)
A perceptually uniform colormap: equal steps in data are perceived as equal steps in the color space. Human brain perceives changes in the lightness much better than changes in hue(颜色).
gist_earth, ocean, and terrain all seem to be created for plotting topography (green/brown) and water depths (blue) together.
获取颜色系列:
colors = pl.cm.jet(np.linspace(a,b,n)) # a,b in [0,1]
matplotlib.cm内置颜色表(colormaps)和处理程序。
Pandas
使用表格数据绘图。类型包括:line、bar、barh(水平柱状图)、hist、box(boxplot)、kde|density (Kernel Density Estimation)、area、pie、scatter、hexbin。plot()方法统一封装了上述类型的绘图方法。
ax = df.plot(x=xname, y=y_names,
             kind='line',
             ..,
             ax=None,
             subplots=False, # separate subplots for each y-column,
             layout=(rows, columns), # subplot layout
             figsize,           # 单独使用Pandas创建窗口使用
             title,             # title (list) for (sub)plot
             grid=False,        # 显示网格
             legend=False,      # place legend
             style:[list,dict], # matplotlib linestyle for column
             logx=False,        # log-scale x axis, => logy, loglog
             xticks,            # => yticks, xlim, ylim, xlabel, ylabel,
             use_index,         # index as x-ticks
             fontsize,
             colormap,
             rot,               # *rot=0水平显示横坐标
             sort_columns=False,
             **kwargs # 传递给绘图方法
            )
ax = df.plot.bar(...,stacked=False,color[list,dict],**kwargs) # => barh
ax = df.plot.hexbin(x='x', y='y', gridsize=20)
ax = df.plot.hist(by=cols, bins=10, **kwargs)
ax = df.plot.scatter(...,c=colors)
x|y:指定DataFrame中用于绘图x轴和y轴数据的列名;同时,x用作坐标轴名称,y用做默认图例名;某些类型的图形可能不需要指定横坐标值(如hist和pie);x轴的值可以是非数值类型,x的值作为刻度均匀分布于坐标轴上,==其位置与数值大小无关==。当未指定x时,适用数据的index作为x值;未指定y时,适用所有数据列绘图。
默认后端:plotting.backend=matplotlib。可以与matplotlib的方法混合使用,例如绘制子图(需要==指定已有的坐标系对象ax==,否则创建新的图形窗口)。
Seaborn
https://stackoverflow.com/questions/62115464/sns-pairplot-shows-density-curve-instead-of-histogram
sns.pairplot(df, vars, hue='class', diag_kind='hist', kind='scatter')
diag_kind='auto'|'hist'|'kde'|None,If ‘auto’, choose based on whether or not hue is used.
kind='scatter'|'kde'|'hist’|'reg'
绘图数据太多会导致内存开销过大,执行缓慢;可随机抽样数据的一个子集绘图。
Plotly
创建图形窗口:
fig = go.Figure(data,layout=None) # data is a single trace or a tuple of traces.
fig.update_layout(**kwargs)
fig.show()
layout是布局对象或创建对象所需的参数字典。创建图形的显示布局对象:
layout=go.Layout(
   title='Network graph made with Python',
   titlefont_size=16,  # layout.title.font
   showlegend=False,
   hovermode='closest',
   margin={'b':20,'l':5,'r':5,'t':40},  # 图形外部填充的空白
   annotations=[{
      'text':"a", 'showarrow':False, 'xref':"paper", 'yref':"paper",
      x=0.005, y=-0.002 }],
   xaxis=dict(showgrid=False, zeroline=False, showticklabels=False),
   yaxis=dict(showgrid=False, zeroline=False, showticklabels=False)
)
布局参数:
width,height:图形的绝对尺寸;margin:图形的边缘空白填充,需要保留填充空间才能显示标题等图形外的内容。
图片
im_ax = plt.imshow(X, cmap=None, norm=None, aspect=None, origin)
X:图像数据矩阵,支持的格式包括:
- $(M,N)$:使用colormap(
cmap)可视化数据。 - $(M,N,3)$:RGB值
- $(M,N,4)$:RGBA值。
aspect:图像纵横比,可设置为equal、auto或任意浮点数值。
origin:指定图像[0,0]像素点位于左上角(upper)或左下角(lower)。
读取图像:
plt.imread(fname, format=None)
fname表示文件名、URL或可读文件对象;format如果未给出则从文件扩展名推测,如果无法推测,则默认为PNG格式。
显示矩阵数据:原点为左上角,图形的比例与矩阵维度比例一致。
plt.matshow(A, fignum=None, **kwargs)
如果fignum=None则创建一个新图形窗口;如果fignum=0则在当前坐标系绘图。
保存图像
plt.savefig(fname, format=None,
            bbox_inches='tight', transparent = False)
fname:文件路径、文件对象等。如果未设置format则从文件名中推测保存格式。该方法不会尝试将格式类型追加为扩展名。format包括'png'、'pdf'、'svg'、……
保存图片:
plt.imsave(fname, X, format=None, ...)
绘制网络图
使用NetworkX绘图
NetworkX提供基于Matplotlib的基本的图可视化方法(其主要是用于图分析),推荐使用专门的图可视化工具如Graphviz。
nx.draw(G)
使用Graphviz绘制网络图
from graphviz import Digraph,Graph
G = Digraph(name=None,
            comment='The Round Table',
            filename='hello.gv',
            directory=None,
            format='svg',    # jpg|png|pdf|svg...
            engine='neato',  # 布局
            encoding='utf-8',
            graph_attr={'rankdir': 'LR'},
            node_attr={'shape': 'plaintext'},
            edge_attr={}
           )
G.source生成图形源代码。
engine参数设置布局引擎,在绘图时自动计算节点位置以及边的形状。
图数据源
添加节点和边的方法。添加边会自动添加不存在的节点。
G.node('A', label='King Arthur', **attr_dict)  # add node
G.edge(tail_name, head_name, label=label_str, **attr_dict)
G.edges(['AB', ('A','L')])  # add edges
节点和边添加后,不能修改指定节点或边的属性,只能修改某类型对象的默认属性。如动态更新图数据,可维护一个外部数据结构,如:NetworkX的图对象或Pandas表格存储的节点和边数据,且提供更加灵活的方法来访问边和节点并修改其属性。最后,在进行绘图前,可首先将图数据表示为上述数据结构,再转换为Graphviz对象。
NetworkX图(G.nodes,G.edges)转换为Graphviz图:
for n in G.nodes:  # G is NetworkX Graph
  g.node(str(n), **G.nodes[n])   # 如果节点索引非字符串,需要首先将其转换为字符串
for e in G.edges:
  g.edge(str(e[0]), str(e[1]), **G.edges[e])
Pandas表格图数据(节点和边数据)转换为Graphviz图。节点数据包含节点索引列和节点属性,边数据包含边首尾节点编号和边的属性。
for idx, n in df_nodes.set_index('id',drop=True).iterrows():
  g.node(str(idx),  **n.to_dict())
for idx, e in df_edges.set_index(['head','tail'],drop=True).iterrows():
  g.edge(str(idx[0]),str(idx[1]),**e.to_dict())
导入外部数据时注意:仅通过接口(如nx.set_node_attributes)设置取值有区别的属性,节点或边的公共属性可通Graphviz提供的attr等方统一设置,因此数据转换时没必要传递给每一个节点或边。
此外,可利用NetworkX提供的pydot接口将NetworkX图对象直接转换为Graphviz的源码,并用于构造Graphviz图对象。
dot: pydot.Dot = nx.nx_pydot.to_pydot(G)
g = gv.Graph(name="Reconstruct from source", strict=True,
             body=dot.to_string().split('\n')[1:-2],...)
body:源码中的正文部分的行构成的==序列==,不包括"[strict] graph <NAME> {"和"}",因此需要根据源码格式去除开始和结尾行。
图的属性
图形元素的默认属性
修改组件的默认属性,后续添加元素如果未声明相应属性则使用默认属性。属性的值均使用字符串表示。
g.attr(kw=None, attrs=value, **kwargs)
kw表示要设置属性的对象类别,包括None,'graph','node','edge',None表示通用属性。attrs表示属性声明文本,例如:"fixedsize=shape shape=circle width=0.5"。kwargs为单独的属性项。也可通过图对象提供的成员(字典类型,g.graph_attr,edge_attr,node_attr)修改对应类别的默认属性。
g.graph_attr['rankdir'] = 'LR' # graph类
全局属性
对于图、节点和边通用的属性。
| 属性 | 说明 | 参数值(字符串) |
|---|---|---|
color | 填充或边框颜色 | `aqua |
style | 图形填充和边框样式 | `filled |
图形属性
| 属性 | 说明 | 参数值(字符串) |
|---|---|---|
engine | 图形布局 | `dot |
rankdir | 图形的流向 | `LR |
size | 图形尺寸 | |
节点属性
| 属性 | 说明 | 参数值说明 |
|---|---|---|
label | 节点标签 | 支持HTML标记<tag></tag>。 |
shape | 节点形状 | box/rect/rectangle/square/:矩形/正方形invtriangle/triangle:三角形diamond/parallelogram:菱形/平行四边形circle/doublecircle/ellipse/oval:圆/椭圆plaintext/plain/none:纯文本tab/folder/note:标签页/文件夹/笔记图标 |
fixedsize | false:由包含内容和边距决定最小长宽,且不小于width,height;true:仅由width,height决定,不会自适应内容;shape:类似于true,但根据内容调整节点距离避免重叠。 | |
width | 节点宽度 | 宽度或最小宽度 |
height | 节点高度 | 高度或最小高度 |
连接属性
| 属性 | 说明 | 参数值 |
|---|---|---|
weight | ||
label | 连线标签 | |
len | 边长度(dot引擎下无效) | 1.00 |
arrowhead | 箭头形状(Digraph) | `normal |
arrowsize | 箭头大小(Digraph) | 2 |
fontsize | 边标签字号 | 10 |
布局
u = w.unflatten(stagger=3)
渲染和保存
将图对象转换为源码并生成图像文件。
G.render('test-output/round-table.gv', view=True, cleanup=False)
gv.render(...,)   # gv.render(filepath,...)
gv.Source.render(...)  #直接从DOT源码渲染对象
To render the generated DOT source code, you also need to install [Graphviz](https://www.graphviz.org/ ).
从字符串读取DOT源码:
G.save()  # 保存图形的DOT源码
dot_src = gv.Source(dot_str, ...)
gv.Source.from_file(...)
dot_src.save(...)
相关模块
pydot
PyGraphviz requires [Graphviz](https://www.graphviz.org/ ).
dot = nx.nx_agraph.to_agraph(G) # pygraphviz.AGraph()
使用Plotly绘制网络图
如果图的节点没有位置信息,需要使用布局引擎来计算节点位置以及边的形状。networkx提供多个布局方法以及基于Graphviz的布局方法生成位置数据。
pos=nx.bipartite_layout(G, nodes, align='vertical',...,aspect_ratio=4/3)
pos=nx.circular_layout(G, scale=1, center=None, dim=2)
pos=nx.nx_agraph.graphviz_layout(G, prog='neato', root=None, args='') # => pygraphviz_layout
pos=nx.nx_pydot.graphviz_layout(G, prog='neato', root=None) # => pydot_layout(...)
root是某些布局算法需要确定的根节点,args为传递给布局程序的额外参数。
pos是关于节点名的字典,元素值为(x,y)。因此,可直接将生成的节位置添加到图的节点属性中:
nx.set_node_attributes(G, pos, name='pos')
生成Plotly绘图数据,即节点和边的绘图数据:
def get_edge_trace(graph, linewidth=3):
    edge_x, edge_y = [],[]
    for edge in graph.edges():
        x0, y0 = graph.nodes[edge[0]]['pos']
        x1, y1 = graph.nodes[edge[1]]['pos']
        edge_x.extend((x0, x1, None))
        edge_y.extend((y0, y1, None))
    edge_trace = go.Scatter(
        x=edge_x, y=edge_y,
        line=dict(width=linewidth, color='#888'),
        hoverinfo='none',
        mode='lines')
    return edge_trace

def get_node_trace(graph, nodesize=20):
    node_x,node_y = [],[]
    for node in graph.nodes():
        x, y = graph.nodes[node]['pos']
        node_x.append(x)
        node_y.append(y)

		marker_specs = {
        'size':nodesize,
        'line_width':2,
        'reversescale':True,
        'showscale':True,
        'colorscale':'Jet', # Greys,Rainbow,Jet,...
        'color':[],
        'colorbar':{title='ColorMeaning',titleside='right',xanchor='left',thickness=15}
     }

    node_trace = go.Scatter(x=node_x, y=node_y,
                            mode='markers', hoverinfo='text', marker=marker_specs)

    num_neighbor = np.zeros(len(graph.nodes))
    node_text = []
    for i, adj in enumerate(graph.adjacency()):
        num_neighbor[i] = len(adj[1])
        node_text.append(f'Number of connections: {num_neighbor[i]}')
    node_trace.marker.color = list(num_neighbor)
    node_trace.text = node_text
    return node_trace
使用Plotly绘制生成的绘图数据(生成的绘图对象可调用show()方法显示)。
layout = go.Layout(...)
fig = go.Figure(data=[edge_trace, node_trace], layout=layout)
绘制表格
使用Plotly绘制表格
plotly_table = go.Table(
  columnwidth = [60]*len(df.columns),   # 宽度比例,绝对宽度由图形宽度决定.
  header=dict(
    values=list(df.columns),
    line_color='darkslategray',
    fill_color='paleturquoise',
    align='center',
    font=dict(color='blue', size=16),
    height=30
  ),
  cells=dict(
    values=[df[col] for col in df.columns], # values given by columns
    #fill_color='lavender',      # cell fill color
    line_color='darkslategray',  # default is None, scalar or list
    fill=dict(color=['lavender', 'white']),  # missing column use the last specified color
    align='center',
    format= ['d'] + [ '.3f']*(len(df.columns)-1),
    font_size=16,
    height=30
  )
)
fig = go.Figure(data=plotly_table)
使用HTML渲染Pandas表格输出
pd.DataFrame.style是Style类型对象,使用生成表格数据的显示格式(CSS)。
https://mp.weixin.qq.com/s/uaYAQj69BCx5EqcxL4uqoA
颜色
def color_negative_red(val):
  color = 'red' if val < 0 else 'black'
  return f'color: {color}'
s = df.style.applymap(color_negative_red)
def highlight_max(s):
    is_max = s == s.max()
    return ['background-color: yellow' if v else '' for v in is_max]
s = df.style.apply(highlight_max, axis=0, subset=['B', 'C'])
需要在支持HTML的输出环境中(例如Notebook或Streamlit)才能显示指定的效果。
Style类型支持链式调用,因此可以将多种格式叠加到一个表格。
数值格式
df.style.format("{:.2%}", na_rep="-")
df.style.format("B": "{:.2%}")   # 设置指定列的格式
df.style.format({"B": lambda x: "±{:.2f}".format(abs(x))}) # 格式化函数
df.style.set_precision(2)
字符串的对齐声明符在HTML输出中无效,使用CSS
text-align属性声明。
内置风格
df.style.highlight_null(null_color='red')
import seaborn as sns
cm = sns.light_palette("green", as_cmap=True)
s = df.style.background_gradient(cmap=cm)
df.style.hide_index()
df.style.hide_columns(['C','D'])
全局风格
使用全局风格声明表格的默认字体、字号、对齐等风格。
list_style = [
  dict(selector="th", props=[("font-size", "4pt")]),   # header
  dict(selector="td", props=[('padding', "0em 0em")]), # cell
  dict(selector="tr:hover",
       props=[("background-color", "%s" % hover_color)]# row
]
df.style.set_table_styles(list_style)
props由一个或多个属性的键值对组成。
设置一个数据切片的的属性:
df.style.set_properties(subset=None, **kwargs)
subset表示表格的子集,例如列名的列表;kwargs为CSS属性。
在列数据背景上绘制柱状图:
df.style.bar(subset=['A', 'B'], color='#d65f5f')
标题:
df.style.set_caption('Colormaps, with a caption.')
共享格式
style2.use(style1.export())
DTale
流程图
diagrams
conda create -n diagram -c conda-forge diagrams # pip install diagrams
Diagrams · Diagrams (mingrammer.com)
图形用户界面
Jupyter Notebook
常用控件
可用控件:
import ipywidgets as widgets
l = pd.Series([x for x in dir(widgets) if not x.startswith('_')])
df_widgets = l.loc[l.apply(lambda x: x[0].isupper())]
display(pd.DataFrame(df_widgets.to_numpy()[:60].reshape(10,6))) # 超过60个内置控件
[Widget List — Jupyter Widgets 8.0.0rc0 documentation (ipywidgets.readthedocs.io)](https://ipywidgets.readthedocs.io/en/latest/examples/Widget List.html)
输入控件
widgets.IntSlider(min=0, max=10, step=1, description='Slider:', value=3)
输出控件
from IPython.display import display
slider = widgets.IntSlider()
text = widgets.IntText()
display(slider, text, ...)
slider.value
IPython.display可根据对象类型采用合适的展示方式,而不仅是print对象。
from IPython.display import display
display(obj_value)
Matplotlib绘图对象会自动显示(无论命令执行位置,显示在单元输出的结尾位置),不需要使用display。
UI属性
description='Int Slider:' # 空间标签
布局和数据交互
连接控件:上一控件的输出更新下一控件的输入。
widgets.jslink((slider, 'value'), (text, 'value'))
UI事件
btn = widgets.Button(description='Medium')
display(btn)
def btn_eventhandler(obj):
    print('Hello from the {} button!'.format(obj.description))
btn.on_click(btn_eventhandler)
刷新输出:使用Output控件捕获cell输出。
output_year = widgets.Output()
def dropdown_year_eventhandler(change):
  output_year.clear_output()
  with output_year:
    display(output_info)
dropdown_year.observe(dropdown_year_eventhandler, names='value')
display(output_year)
Streamlit
安装:
pip install streamlit # conda install streamlit -c conda-forge
启动:
streamlit run app.py
编辑程序:运行中的程序可感知代码发生变换,并重新执行。
import streamlit as st
版本信息:
st.__version__
UI组件
key:默认以UI的标签区分UI对象,如果标签相同,则需要提供额外的key参数区分UI对象。
标签
标题:
st.title('Title')
st.header('Header1')
st.subheader('Header2')
选择
按钮/开关:
tf_press = st.button("Button")
tf_check = st.checkbox("Check", value=False)
单选组:
genre = st.radio(
     "What's your favorite movie genre",
     ('Comedy', 'Drama', 'Documentary'),
     index=1
)
单选下拉列表:
option = st.selectbox(
    'How would you like to be contacted?',
    ('Email', 'Home phone', 'Mobile phone'),
    index = 2
)
数值选择器:
age = st.slider(
  'How old are you?',
  value=25,
  min_value=0, max_value=130)
类型选择器:
color = st.select_slider(
    'Select a color of the rainbow',
    options=[
      'red', 'orange', 'yellow', 'green', 'blue', 'indigo', 'violet']
)
颜色选择:
color = st.color_picker('Pick A Color', '#00f900')
多选:
options = st.multiselect(
    'What are your favorite colors',
    ['Green', 'Yellow', 'Red', 'Blue'],
    ['Yellow', 'Red']
)
输入
单行文本输入:
title = st.text_input('Movie title', value = 'Life of Brian', type='default')
type=password:设置为密码输入框。
文本区(多行文本输入):
txt = st.text_area('Text to analyze',
'''It was the best of times, it was the worst of times, it was
the age of wisdom, it was the age of foolishness, it was
the epoch of belief, it was the epoch of incredulity, it
was the season of Light, it was the season of Darkness, it
was the spring of hope, it was the winter of despair, (...)''',
    height=200
)
数值输入:
number = st.number_input('Insert a number',
                         value=50,
                         min_value=0, max_value=100,step=1,
                         format='%.2f')
日期输入:
d = st.date_input(
    "When's your birthday",
    datetime.date(2019, 7, 6)
)
时间输入:
t = st.time_input('Set an alarm for', datetime.time(8, 45))
文件上传
uploaded_file = st.file_uploader("Choose a CSV file", type="csv")
文本输出
st.write根据对象类型选择相应的输出格式。
st.write(object)
全局作用域中的多行注释内容将被视为Markdown格式内容添加到输出结果中(等效于st.write),因此可以利用该性质添加段落输出。
文字格式输出:
st.text(text)     # 等宽字体
st.caption(text)  # 小号字体
数字指标输出:
st.metric(label="Streamlit version", value=0.87, delta=0.01)
表格输出
st.dataframe(data:Union[pd.DataFrame,pd.Styler,np.ndarray,Iterable,dict])
支持df.style的高亮语法,不支持宽度和对齐等设置。高度固定,自动生成水平/垂直滑动块;
Streamlit不能输出超过50MB的表格,此时可以仅截取部分内容输出。
Streamlit目前不能显示
category类型的数据。
table = st.table(df):支持自动调整列宽,在页面上显示全部内容。当页面宽度足够时,设置宽度有效。
信息块
st.success('This is a success message!')
st.info('This is a purely informational message')
st.warning('This is a warning')
st.error('This is an error')
e = RuntimeError('This is an exception of type RuntimeError')
st.exception(e)  # display an exception
动画
进度条:
# placeholder = st.empty()  # 进度条占位符
my_bar = st.progress(0)  # placeholder.progress(0)
for percent_complete in range(10):
    time.sleep(0.1)
    my_bar.progress(percent_complete * 10)
# placeholder.empty()  # 移除进度条
可将进度条置于st.empty()中,可以在进度完成后手动移除进度条。
进度指示器:
with st.spinner('Wait for it...'):
    time.sleep(5)
下载
st.download_button
布局
st.set_page_config(page_title='动态服务管理', page_icon=None,
                   layout='wide', initial_sidebar_state='auto')
在其他命令使用前运行。
容器
在一个容器中添加多个UI组件。
with st.container():
  st.write("This is inside the container")
  st.bar_chart(np.random.randn(50, 3))
group = st.container()
group.write("This is inside another container")
与主页中直接组件的效果添加相同,和empty()不同不能更新已添加的组件。可以将empty()置于容器内部。
简单容器
空占位符st.empty():可在后续代码中向其中添加==一个==UI组件。空占位符引用该组件对象,因此可以多次调用该组件以更新其内容。
普通方式调用组件函数未返回组件对象的引用,因此无法对其更新,重复调用组件函数将创建多个UI组件。
placeholder = st.empty()
for i in range (1,100):
  placeholder.text(f'Progress is: {i}')   # update text
删除占位容器中的UI组件:
placeholder.empty()
可使用placeholder多次创建UI组件并替换现有内容。==通常不使用包含key参数的UI组件==(通常是输出组件,例如st.progress, st.write, st.text等),如果再次通过placeholder替换该类型组件,需要提供不同的key。
在with语句块中调用组件函数不会重复创建UI,with语句块结束后其中创建的组件不会消失。
with st.empty():
   for seconds in range(60):
      st.write(f"⏳ {seconds} seconds have passed")
      time.sleep(1)
   st.write("✔️ 1 minute over!")
可在st.empty()中设置一个container,从而构造可刷新的仪表板。
placeholder = st.empty()
with placeholder.container():
    # place components here!
折叠内容
with st.expander(title, expanded=True):
  add_components
表单
with streamlit.form(key:str):
   # add_components
   slider_val = st.slider("Form slider")
   submitted = st.form_submit_button("Submit")  # 提交按钮位于表单环境中
   pass
if submitted:
   handle_form_data
UI响应:未使用表单时,更改UI组件状态将自动触发代码重新执行(更新组件后台状态);使用表单后,更改表单内部组件的状态不会自动触发代码重新执行,内部组件的状态由表单UI组件缓存,直到点击提交按钮才会向后台发送状态变更并触发代码执行。
状态缓存:代码执行时,总是使用上次点击“提交”按钮后的各组件的后台状态。
水平线性布局
col1,co2,... = st.columns(n_or_portion)
with col1:
  add_components_to_col1
co2.add_components
当参数为整数n时表示创建n个等宽列;如果为列表portion,则根据列表元素值确定每列的宽度占比。
水平多标签页
tab1, tab2, tab3 = st.tabs(['页面1', '页面2', '页面3'])
with tab1:
    pass
tab2.dataframe(df)
侧边栏
在主页面上可使用的组件也可以添加到侧边栏(侧边栏可看组是一个特殊容器)。
add_selectbox = st.sidebar.selectbox(
    "How would you like to be contacted?",
    ("Email", "Home phone", "Mobile phone")
)
多页面App
多页面App将单页面应用的代码按功能分解到多个文件中,代码组织结构如下。
multipage-app
├── 01_⏱_demo_app.py
└── pages
    ├── 02_🍕_output_demo.py
    ├── 03_🥗_input_demo.py
    └── 04_🥩_plots_demo.py
streamlit run 01_⏱_demo_app.py
页面可根据文件名编号指定顺序展示。
绘图
内置绘图
chart = st.line_chart(data=None, width=0, height=0)
chart = st.area_chart(data=None, width=0, height=0)
chart = st.bar_chart(data=None, width=0, height=0)
use_container_width=True:与页面宽度一致。
可以向图形对象添加数据,从而更新返回结果。
chart.add_rows(data2)
显示图像
from PIL import Image
image = Image.open('sunrise.jpg')
st.image(image,caption='Sunrise',width=None,use_column_width='auto',output_format='png')
Matplotlib绘图
fig,ax = plt.subplots(figsize=(width_inch,height_inch),...)
ax.bar(x1,y1)
st.pyplot(fig=fig, **kwargs_savefig)
matplotlib的绘图后端:
matplotlib.rcsetup.all_backends   # supported backends
matplotlib.pyplot.get_backend()   # current use backend
==图形占用的宽度总是与页面宽度一致,图形的尺寸只影响显示的分辨率==。
-
可以使用
st.columns将页面划分为多个部分,而只在其中一列中放置图形。 -
将绘图转换为图片,使用
st.image显示。from io import BytesIO buf = BytesIO() fig.savefig(buf, format="png") st.image(buf, caption=None, width=600, output_format='png')
graphviz绘图
import graphviz
graph = graphviz.Digraph()
st.graphviz_chart(graph)
bokeh(*无法显示图像)
Visualizing network graphs — Bokeh 2.3.1 Documentation
from bokeh.plotting import figure
p = figure(
    title='simple line example',
    x_axis_label='x',
    y_axis_label='y')
st.bokeh_chart(p, use_container_width=True)
Plotly
API reference — Streamlit 0.81.1 documentation
Tutorial: Network Visualization Basics with Networkx and Plotly in Python | Towards Data Science
import plotly.figure_factory as ff
fig = ff.create_distplot(
        hist_data, group_labels, bin_size=[.1, .25, .5])
st.plotly_chart(fig, use_container_width=True)
代码执行
UI与程序执行流程
UI状态变更后,程序将从头重新执行。
当执行到UI创建代码后,UI创建代码会根据输入使用缓存UI或重绘UI,相应地返回的值为上一次UI状态变更时的数据,或本次重绘UI后的初始值。
UI缓存
UI内置了缓存机制,以保存UI状态更改。UI初始化应该使用常量(每次运行用户程序不变的量),从而保证UI对象始终缓存。不需要尝试手动保存UI的最新状态,并随后再次使用最新状态初始化UI。
实际上,由于界面状态更新后,用户代码才开始执行,当执行到相应UI代码时,会使用上一次的缓存状态再次初始化UI并返回初始化值(即上一次的缓存状态),导致用户获取不到更新的界面状态。一般情况下,==如果界面初始化参数发生变化都将导致用户上一次的UI更改无效==。
下图以
selectbox为例,初始化index=0(初次执行代码后用户缓存该值cache=0),如果用户选择index=2将刷新页面并再次执行代码,UI对象的初始化输入不变(cache=0-->index),因此返回给程序用户记录的选择(2);当用户再次选择(index=1)并触发界面刷新和代码执行,UI对象的初始化输入从index=0变为index=2,会导致UI对象的重新初始化,并返回再次初始化的结果(index=2),与用户的目标选择不一致。这时用户获取的结果和界面显示一致,继续操作会导致上述行为会反复出现。如下图所示:
graph LR
A[index=0]-->X1(get_ui)-->B(sel=0)-->|user select|D[index=2]-->X2[get_ui]
B-->C(cache=0)-->|缓存一致|X2-->E(sel=2)-->|user select|D2[index=1]-->F
E-->C1(cache=2)-->|缓存落后|F[update_ui]
A_[index=0]-->X1_(get_ui)-->B_(sel=0)-->|user select|D_[index=2]-->X2_[get_ui]-->E_(sel=2)-->|user select|D2_[index=1]-->F_[get_ui]
实际上,用户可以缓存数据,但无需将其应用于更新UI。用户利用缓存数据与最新数据的对比以确定某个UI的状态变化从而执行相应操作。
回调函数
状态变更后,代码从头开始执行。回调函数将先于其他代码首先被执行。回调函数仅知道UI状态变化,无法获取变更后的值。
缓存
Streamlit可以缓存函数的返回对象,从而优化性能。
Streamlit在调用函数时记录函数名、函数参数、外部变量、函数体内容、调用的用户自定义函数内容,当再次调用函数时检测上述内容(基于Hash函数)是否被修改。如果未发生修改,则直接返回缓存对象;反之,重新执行函数并缓存新的对象。
streamlit.cache(
  func=None,                   # 调用的函数对象
  persist=False,               # 是否缓存到磁盘
  allow_output_mutation=False, # 允许返回对象在外部被修改,不计算返回对象的Hash
  hash_funcs={Type:hash_func}, # 自定指定类型对象的Hash函数
  max_entries=None,            # 最大缓存条目数
  ttl=None                     # 缓存有效期(秒)
) -> object
@st.cache(**kwargs)
func(*args, **kwargs):
  pass
Hash函数
- 返回对象的基础类型成员,Streamlit可以使用内置Hash函数对其再进行Hash;
id()函数:用于传入参数,计算全局唯一对象(指向外部资源)的内存地址,例如会话连接;lambda _: None:已知对应类型对象不会在程序运行期间发生变化(避免对大型数据结构的计算开销);hash()函数:使用Python内置的hash方法代替Streamlit的hash方法,以解决某些类型无法计算hash值得问题;- 自定义
变量显式缓存
全局缓存:用户可以定义缓存函数创建缓存的数据容器(如字典),以显式缓存程序运行过程中产生的变量。
@st.cache(allow_output_mutation=True)
def namespace(name:str):
    return {}
ns = namespace('streamlit')
ns['x'] = 100
@st.experimental_memo
@st.experimental_singleton
会话状态缓存
st.session_state:与每个Web会话(WebSocket)相关的缓存变量,同一应用的不同页面其会话缓存变量相互独立。
多线程执行
每开启一个Web页面,Streamlit应用会启动一个子线程执行该应用的用户代码并在Web页面进行展示。多个线程共享全局缓存空间,具有独立的会话状态空间。
基于Streamlit的服务
利用Streamlit应用运行的规则,可以在用户代码中封装一个服务(持续执行不退出),当首次开启应用时启动该服务,并在全局缓存中记录服务的运行状态;后续再启动应用时,检测该服务的状态,并与该服务进行交互。
问题
inotify watch limit reached,该问题会导致无法监控到后台文件更新,以及streamlit无法刷新Web页面(创建连接Streamlith后台服务的WebSocket失败)。
机器学习可视化
性能评估可视化
混淆矩阵
Confusion Matrix
from sklearn.metrics import ConfusionMatrixDisplay as cm_disp
disp = cm_disp.from_predictions(y_test, y_pred)
disp = cm_disp.from_estimator(clf, X_test, y_test) # 直接从分类器获取预测
plt.show()
# 自动生成混淆矩阵并创建图形对象
# cm = confusion_matrix(y_test, y_pred) # from sklearn.metrics import confusion_matrix
# disp = cm_disp(confusion_matrix=cm, display_labels=clf.classes_)
# disp.plot()
问题
中文乱码
原因:Linux系统缺少中文字体;
解决方法:
-
下载中文字体(从Windows系统中复制),黑体(
simhei.ttf)、华文宋体(STSONG.TTF)、楷体(simkai.ttf)...... -
将字体==安装==到
/usr/share/fonts目录下,并链接到matplotlib的字体目录下。cd $CONDA_HOME/envs/$ENV/lib/python3.7/site-packages/matplotlib ln -s /usr/share/fonts/simhei.ttf mpl-data/fonts/ttf/simhei.ttf -
修改
matplotlib配置文件:vim mpl-data/matplotlibrc font.family: sans-serif # uncomment font.sans-serif: simhei,... # uncomment and add fonts at head -
删除缓存文件:
rm ~/.cache/matplotlib/fontlist-v###.json -
重启Python程序。
中文字体测试代码
from matplotlib.font_manager import FontManager
import subprocess

fm = FontManager()
mat_fonts = set(f.name for f in fm.ttflist)
print( '*' * 10, 'Matplotlib可用字体', '*' * 10)
for f in mat_fonts:
    print(f)
output = subprocess.check_output(
  'fc-list :lang=zh -f "%{family}\n"', shell=True, encoding='utf-8')
print( '*' * 10, '系统可用的中文字体', '*' * 10)
zh_fonts = set(f.split(',', 1)[0] for f in output.split('\n'))
for f in zh_fonts:
    print(f)