网络服务软件
Apache2
安装
sudo apt install apache2
安装完成后,服务器在后台运行,即可通过IP地址访问服务器。
服务器以管理员身份运行。
服务器运行管理
sudo service apache2 start
sudo /etc/init.d/apache2
apache2ctl start|stop|restart|....
创建网站
默认站点
内容位于/var/www/html(可通过配置文件/etc/apache2/sites-enabled/000-default.conf修改站点的根目录等信息)。
创建站点
Apache通过编辑虚拟主机(Virtual Host)文件来管理多个站点。可以通过复制默认站点文件来创建新的站点的配置文件。
cd /etc/apache2/sites-available
sudo cp 000-default.conf server.conf
000-default.conf对应的是HTTP服务的默认站点,default-ssl.conf对应的是HTTPS服务的默认站点。
虚拟站点
然后编辑站点的配置文件*,其中
[Listen [ip_addr:][port]]

<VirtualHost [ip_addr][:port]>
    ServerAdmin yourname@example.com  # 管理员邮箱
    DocumentRoot /var/www/server/     # 站点根目录
    ServerName www.server.net         # 站点域名(默认文件中没有此项)
</VirtualHost>
IP地址可以为通配符(
*);一个配置文件可包含多个
VirtualHost,默认站点不需要添加域名,其他站点需要设置唯一的ServerName。也可以将不同的VirtualHost放到单独的配置文件中。
在/var/www/(或其他目录)下创建站点对应的文件夹。
sudo mkdir /var/www/server
完成上述配置后,需要运行以下命令以启用站点。
sudo a2ensite server.conf # enable an apache2 site(virtual host)
使用
a2dissite停用站点。
完成后重启Apache,
service apache2 reload # or
systemctl reload apache2
启用安全服务(HTTPS)
启用ssl模块和安全站点的配置文件。
sudo a2enmod ssl
systemctl restart apache2  # 重启Apache服务器
服务器管理
配置文件
配置文件位于:/etc/apache2/。
/etc/apache2/
|-- apache2.conf
|----  ports.conf
|-- mods-enabled
|---- *.load
|---- *.conf
|-- conf-enabled
|---- *.conf
|-- sites-enabled
|---- *.conf
apache2.conf是主要配置文件。
ports.conf
httpd
默认欢迎页面配置:/etc/httpd/conf.d/welcome.conf,移除该文件以禁用默认配置。
支持在服务目录下访问符号链接的权限:
-
服务目录配置支持跟踪符号链接;
<Directory "/var/www/html"> Options Indexes FollowSymLinks AllowOverride None Require all granted </Directory> -
http服务的运行用户(
apache)具有访问(execute)目标目录(及其父目录)的权限;httpdSymbolic link not allowed or link target not accessible -
可能需要关闭SELinux,以允许http服务访问服务目录外的位置。
You don't have permission to access
/directoryon this server
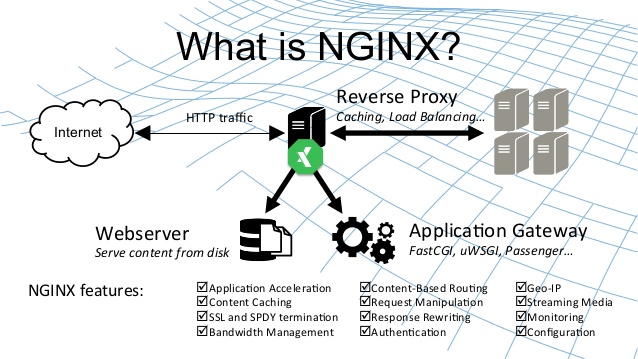
Nginx
CentOS安装:Nginx位于EPEL软件源中;Ubuntu软件源中已包含Nginx。
Nginx服务通常通过systemd管理(start|stop|restart|reload)。
服务器配置
配置文件
/etc/nginx/
-- /etc/nginx/nginx.conf           # top-level configuration file
-- /etc/nginx/conf.d/              # HTTP server sites
-- /etc/nginx/conf.d/default.conf  # configuration template
-- /etc/nginx/sites-available      # apache-style config dir
-- /etc/nginx/sites-enable
nginx.conf是Nginx的主要配置文件,其中可以使用include指令将其他服务配置文件加入。如果某个配置项有错误,该配置项以及之后的配置项都不会被加载。在运行Nginx之前可先测试配置是否存在问题:
nginx -t -c /PATH/nginx.conf # 使用绝对路径,否则nginx会从默认配置目录读取
配置语法
设置变量:set $variable value;,值如果包含空格等特殊字符,需要使用""。
基本配置
access_log  /var/nginx/logs/access.log;
error_log   /var/nginx/logs/error.log;      # 错误日志
error_log   /var/nginx/logs/info.log  info; # 将指定级别日志输出到指定文件
pid         /var/nginx/logs/nginx.pid;      # Nginx主进程ID
日志格式
log_format main '$remote_addr - $remote_user [$time_local] $server_name ...'
日志中NGINX提供的内置变量,以记录请求服务信息。
$server_name/server_addr/server_port:接受该请求的服务器名称(域名/IP地址)、地址、端口;$request_uri/$uri|$document_uri:原始请求URI(包含参数)、规范化URI;$query_string|$args:请求URI的查询参数;$scheme/$server_protocol/$request_method:请求使用http/https、HTTP协议版本、HTTP方法;$https:是否开启HTTPS、$request_length/$request:请求数据长度(包括请求行、头部以及请求体)、请求行;$remote_addr/$remote_port/$remote_user/:客户端地址、端口和用户名(基本认证机制);$content_type/$cookie_name:请求头部信息;$time_local:服务器当前时间;status:响应状态;
HTTP静态站点
通过server块定义虚拟HTTP服务站点。其中listen和server用于定义虚拟服务的映射条件1:
listen:映射目标IP和端口,多个虚拟服务可共用相同的地址和端口,通过域名进行区分;如果省略IP地址,则监听服务器的所有地址;如果省略端口,则默认监听端口为80或8000。server_name:客户端请求域名,多个域名以空格分隔,支持通配符以及正则表达式匹配2。如果未匹配到任何域名,则将请求转发至listen字段包括default_server的服务站点。
http {
   server {
      listen 80 default_server;       # 监听[ip_addr:]port
      server_name www.example.com example.com;
      root /var/www;                  # 默认根目录(仅能访问根目录下的内容)
      location / {                    # 根目录配置
         index index.html index.htm;  # 默认主页,设置在根目录的配置下
         root /usr/share/nginx/html;  # 根目录对应的物理目录[路径重定向]
      }
   }
   server {   # 使用相同地址服务不同域名的HTTP服务
      listen      80;
      server_name test.example.com;
      root /var/test;
   }
}
default_server:未匹配到域名时的默认服务。
Nginx默认的服务进程用户为nobody/nginx,因此服务目录下文件应该对所有用户有读权限,所有目录对所有用户有访问权限,否则会产生403 Forbidden错误。
文件服务器
http {
  server {
    autoindex on;            # 显示目录
    autoindex_exact_size on; # 显示文件大小
    autoindex_localtime on;  # 显示文件时间
    # ...
    root /share/fs;
  }
}
反向代理转发
location ^~ /test/ {
    proxy_pass      http://host_addr:8080;
}
location ^~ /test/1 {
    proxy_pass      http://127.0.0.1:8080;
}
location = /test/prefix/ {
    proxy_pass      http://127.0.0.1:8080;
}
location ~ ^/debug(.*)/log(.*)/ {
    proxy_pass      http://host_addr:8080/debug_log/$1/$2/;  #*
}
location / {
    proxy_pass      http://127.0.0.1:8080;
}
*:如果匹配规则为正则表达式,转发地址中可包含正则表达式的捕获参数。
URL位置匹配规则(匹配优先级从高到低)3:
-
前缀匹配:以
=、^~修饰或无修饰符的匹配规则,按书写顺序检查。location = URI:精确匹配,匹配后立即响应请求。通常写在规则列表前面,用于匹配最常访问的URL如location = /。location ^~ URI:优先最长匹配,如果请求路径包含指定前缀,在匹配所有前缀匹配规则后,返回带^~的最长匹配;通常用于匹配服务器上的资源目录。location URI:最长匹配,记录下最长匹配记录,==但不做处理==(==优先级最低==,但搜索先于正则匹配;可能是为了一同调用前缀匹配模块)。
以
/test/1合上述规则为例,匹配顺序为:priority prefix match for location: /test/ priority prefix match for location: /test/1 # Final Match prefix match for location: / -
正则表达式匹配:
location ~ URI(~*大小写敏感)按顺序查找,匹配到后立即响应请求;通常用于根据规则匹配URL,并在后续对URL进行修改。 -
最长前缀匹配:使用前缀匹配过程中记录到的最长匹配响应请求;通常会设置
location /作为默认规则,因此,请求最后总能被一条规则所处。Nginx location block section:https://stackoverflow.com/a/59846239/6571140
编写匹配规则时,应该将较为精确的匹配项放在靠前的位置,否则更加模糊匹配项会覆盖精确匹配项,导致与期望的转发行为不一致。当出现转发失败或未按期望转发时,可对比Nginx的日志文件access.log和error.log(其中包含了用户的请求URL与Nginx的响应URL),排查错误原因。
资源路径重定向
rewrite将指定路径并替换为新的路径,root重新指定资源的根目录。
location [modifier] [URI] {
  rewrite /path/($REGEX)/subpath/ replace_path break;
  root base_path;   # 实际访问 base_path/replace_path
}
$REGEX表达式可使用正则表达式,replace_path和base_path可使用rewrite表达式的捕获组($1,$2,...)。
HTTPS配置
Docker Containers - Rocket.Chat Docs
server {
   ssl_certificate /etc/nginx/certificate.crt;
   ssl_certificate_key /etc/nginx/certificate.key;
   ssl_dhparam /etc/nginx/dhparams.pem;
}
"ngx_master_****" was not signaled for 5s:在Windows下,由于SSL密钥需要输入密码导致Nginx服务启动超时。可将证书密码保存在文本文件中(放在安全位置),并在Nginx配置文件中添加ssl_password_file pass.txt或者将密钥的密码验证移除:
openssl rsa -in server.key -out serverunsecure.key
负载均衡
http {
  upstream load_balance_server {
    least_conn;  # 负载均衡策略(默认为轮询)
    server 192.168.1.11:80   weight=5;  #*
    server 192.168.1.12:80   weight=1;
    server 192.168.1.13:80   weight=6;
  }
  server {
    location / {
      proxy_pass http://load_balance_server;
    }
  }
}
负载均衡策略:
- (加权)轮询:
weigth参数表示权值,权值越高被分配到的几率越大。; - (加权)最少连接:
least_conn; - IP映射:
ip_hash; - URL映射:
hash $request_uri;
Nginx常见错误
-
unknown directive "ssl" nginx:Nginx未安装SSL模块。 -
403 Forbidden (nginx: Permission denied):1)文件及其上级目录权限配置不正确,Nginx工作进程所属用户无访问权限;SELinux开启阻止Nginx访问文件(特殊情况下,仅某个特殊文件无法被访问)。Modifying SELinux Settings for Full NGINX and NGINX Plus Functionality
-
502 Bad Gateway (nginx: (13: Permission denied) while connecting to upstream):系统开启SELinux,默认不允许HTTP服务软件连接系统的其他服务(进行代理转发)。可选择:1)关闭SELinux;2)修改SELinux策略;setsebool -P httpd_can_network_connect on # [on/1] -P for persistent -
CORS(cross-origin resource sharing,跨源资源共享)错误:客户端请求缺少CORS标准相关的HTTP头部字段,浏览器不允许上述跨域访问行为。在不修改客户端(HTML或JS代码等)的情况下,可通过NGINX代理修改HTTP请求头部实现跨域资源共享。
add_header 'Access-Control-Allow-Origin' '*'; #* add_header 'Access-Control-Allow-Methods' 'GET, POST, OPTIONS'; #** add_header 'Access-Control-Allow-Headers' '*'; #*** add_header 'Access-Control-Allow-Credentials' 'true'; #**** if ($request_method = 'OPTIONS') { return 204; }*:该头部选项允许通配符以允许匹配的请求源站点。**:允许跨域访问的HTTP方法,支持通配符。***:如果出现Request header field xxx is not allowed by Access-Control-Allow-Headers in preflight response.,添加该头部,支持通配符。****:如果响应内容未携带该头部,浏览器将不会把响应内容返回给请求发送者。在响应附带身份凭证的请求时,不能将上述头部的值设置为通配符。 -
修改配置重新加载不生效(例如日志配置无效不输出日志):
可能原因:Nginx后台进程未正常关闭(Windows),导致新启动的Nginx实例无法正常初始化。
解决方法:手动结束所有Nginx进程后,重新启动Nginx。
Caddy
Fast and extensible multi-platform HTTP/3 web server with automatic HTTPS.
安装
choco install caddy
运行Caddy服务
$env:XDG_DATA_HOME='path/'
caddy run --config caddy.json/Caddyfile --watch #*
caddy start|stop|reload  # 后台服务管理
caddy.json或Caddyfile是配置文件,如果未提供配置文件,则服务器只有管理接口可访问。
*:--watch将监视配置文件更改并自动重新加载。
管理接口
http://localhost:2019/config/
Caddy模块
Caddy预装了标准模块,如匹配器、处理器、反向代理、TLS和日志等。
.\caddy.exe list-modules
配置Caddy
可使用JSON或Caddyfile对Caddy服务进行配置。JSON格式信息完整,对计算机解析更加友好;Caddyfile相对更加简洁,适合人工配置。
JSON配置
{
    "apps": {
        "http": {
            "servers": {
                "<server-name>": {
                    "listen": [
                        "[host]:port"
                    ],
                    "routes": [
                        {
                            "match": [
                                {"host": ["domain.name"]}
                            ],
                            "handle": [
                                {
                                    "handler": "file_server",
                                    "root": "/path/to/html"
                                }
                            ]
                        }
                    ]
                }
            }
        }
    },
    "admin": {/*...*/},
    "logging": {/*...*/},
    "storage": {/*...*/}
}
JSON Config Structure - Caddy Documentation (caddyserver.com)
routes
定义了请求的匹配规则及其处理路径。match用于定义匹配规则,handle定义请求的处理方法。
handler
static_response:直接通过配置文件设置响应内容(body);file_server:响应服务器上的静态文件资源(root)。reverse_proxy:反向代理。
Caddyfile配置
Caddyfile包含全局选项(可选)、配置片段(可选)、一个或多个站点配置块以及注释(#开头后续内容)。如果配置文件只包含一个站点,其配置块的{}可省略。

匹配器必须在站点内部定义,不存在跨站点的全局匹配器。
站点地址格式:
localhost、localhost:8080、127.0.0.1:监听指定IP地址/主机名和端口的请求;example.com、http://example.com:监听指定端口上的域名请求;:443、[::1]:2015、http://:监听所有地址的指定端口;*.example.com:监听所有匹配域名的请求。
在Caddyfile中可引用Shell环境变量,{$SITE_ADDRESS}。
静态资源服务
文件服务
example.com {  # 站点域名(IP地址端口)
    root * /home/me/mysite
    try_files {path} /index.html # 如果指定URL不存在, 则回落到index.html
    templates                    # 支持模板
    encode zstd gzip             # 开启内容压缩
    file_server browse           #*
}
*:browse选项为没有index.html的目录提供自动文件索引,否则访问对应目录的URL将返回404。
提供文件服务的快捷方式:
caddy file-server --listen :2015 --browse --root ~/mysite --domain my.domain
静态响应
localhost {
    respond "hello world!"
}
反向代理
example.com {
    reverse_proxy "/api/*" localhost:5000
    # handle /api/* {
    #     reverse_proxy backend:8000
    # }
}
反向代理可与静态站点结合使用:反向代理仅转发API请求,通过/api/*过滤后的静态文件则直接通过文件服务器响应。==具有匹配规则的处理方法将被优先检查==。
反向代理服务快捷方式:
caddy reverse-proxy --from :2080 --to :9000
省略
--form,则默认监听localhost:443的请求(或在.localhost中定义的域名)。--to默认转发至协议为http,如果后端使用https,则在转发地址中显式指定https://。
HTTPS
By default, Caddy serves all sites over HTTPS.
local_certs:(全局选项)所有证书采用通过本地签发,不通过公开的证书签发机构(用于开发环境)。
本地HTTPS
To serve non-public sites over HTTPS, Caddy generates its own certificate authority (CA) and uses it to sign certificates. The trust chain consists of a root and intermediate certificate. Leaf certificates are signed by the intermediate. They are stored in Caddy's data directory at
pki/authorities/local.
Pelican
Pelican is a static site generator
- Write your content directly with your editor of choice in reStructuredText or Markdown formats
- Includes a simple CLI tool to (re)generate your site
http://docs.getpelican.com/en/3.6.3/index.html
http://docs.getpelican.com/en/3.6.3/publish.html#deployment
Gunicorn
Gunicorn, 'Green Unicorn' is a Python WSGI HTTP Server for UNIX.
It is best to use Gunicorn behind an HTTP proxy server. We strongly advise you to use nginx.
Squid代理服务
web proxy cache server:提供HTTP、FTP等协议的代理和缓存服务,支持全面、细粒度的访问控制机制。
安装:
sudo apt install squid
sudo systemctl start/stop/reload squid #* 非root用户需要使用sudo, 否则可能导致缓存目录创建失败
配置
/etc/squid/squid.conf
服务端口
http_port 3128
服务地址:http://proxy-server:http_port。
磁盘缓存
默认缓存在内存中(重启服务丢失),可指定多行以使用不同的磁盘分区。
cache_dir ufs/aufs/diskd Directory-Name Mbytes L1 L2 [options]
cache_dir rock Directory-Name Mbytes [options]
-
缓存数据格式,包括
ufs(默认包含)、aufs、diskd、rock。不同系统中的分发版可能不包含所有格式,通过修改配置文件并尝试启动服务确定相应格式是否可用。 -
Mbytes:缓存容量限制(默认100MB); -
L1:缓存目录下一级子目录数量,默认为16,Squid将请求URL通过Hash计算确定缓存内容的目录;这些子目录不是动态生成的,因此在服务运行时删除缓存目录下生成的子目录,会导致后续缓存内容无法保存(从而无法响应客户端)。
-
L2:缓存一级子目录下二级子目录数量限制,默认为256;
访问控制
限定访问代理服务的用户IP、访问时间。
acl src_rule  src ip_addr/mask
acl time_rule time M T W T F 9:00-17:00  # 工作日工作时段
http_access allow src_rule time_rule   # 满足所有规则才可使用代理
Nexus代理服务
安装
主机安装
下载Linux版本的二进制档案文件,并解压到安装路径(例如/opt/sonatype),将nexus-ver重命名为nexus。档案的基本结构如右图所示。
创建运行nexus服务的用户,并将nexus的安装目录所有权限更改为该用户。
useradd --system --no-create-home nexus
chown -R nexus:nexus /opt/sonatype
# edit: nexus/bin/nexus.rc
run_as_user="nexus"
设置数据和日志目录(nexus/bin/nexus.vmoptions)。如果默认位置的存储空间不够或读写速率较低,则可以修改以下配置项。
-XX:LogFile=../sonatype-work/nexus3/log/jvm.log
-Dkaraf.data=../sonatype-work/nexus3
-Dkaraf.log=../sonatype-work/nexus3/log      # 日志文件目录
-Djava.io.tmpdir=../sonatype-work/nexus3/tmp
Nexus主要配置位于安装目录etc/目录下,其中nexus-default.properties为HTTP连接和网络应用默认配置。用户可在数据目录下的$data_dir/etc/nexus.properties修改相应属性(首次运行前该目录和文件不存在)4。
application-port=9081      # 网络连接
nexus-context-path=/nexus/ # Base URL
base URL也可以在运行后,通过System/Capabilities/Base URL来设置。
更新Java运行环境():
export JAVA_HOME=/usr/local/openjdk8  # 或 JDK_HOME,INSTALL4j_JAVA_HOME
INSTALL4J_JAVA_HOME_OVERRIDE=/usr/local/openjdk8  # edit: nexus/bin/nexus
修改打开文件限制(如果使用systemd启动则在服务配置文件中设置相应选项):
# edit: /etc/security/limits.conf
#<domain>      <type>  <item>         <value>
  nexus         -       nofile         65536
配置为系统服务、加载服务配置并启用该服务。
[Unit]
Description=Nexus Service
After=syslog.target network.target
[Service]
Type=forking
LimitNOFILE=65536
Environment=JAVA_HOME=/usr/local/openjdk8
ExecStart=/opt/sonatype/nexus/bin/nexus start
ExecStop=/opt/sonatype/nexus/bin/nexus stop
User=nexus
Group=nexus
Restart=on-failure
[Install]
WantedBy=multi-user.target
注意启动命令不要使用符号链接,因为
nexus启动时会根据可执行文件所在目录的相对路径来寻找数据目录sonatype-work,而符号链接会导致相对路径位置不正确。
首次登录管理员:初始密码随机生成,存储在/nexus-data/admin.password。
Windows下的服务管理,
./nexus.exe /install/uninstall    # 安装卸载服务
./nexus.exe /start/status/stop    # 启停服务,查看状态
./nexus.exe /run                  # 直接运行服务
Installing Sonatype Nexus Repository OSS on CentOS 7 | FOSS Linux
存储配置
仓库清理策略:通过Repository/Cleanup Policies添加清理策略,可按包的发布时间或最后下载时间设置清理策略。
HTTP网络代理配置
System/HTTP/{HTTP proxy|HTTPS proxy}(例外项可使用http.nonProxyHosts通配符)。
docker
docker run -d -p 8081:8081 --name nexus-porxy \
           -v nexus-data:/nexus-data sonatype/nexus3
配置软件源代理
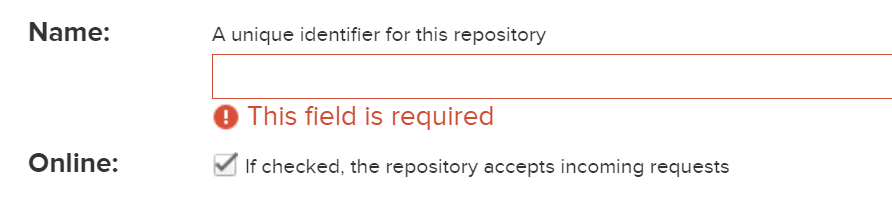
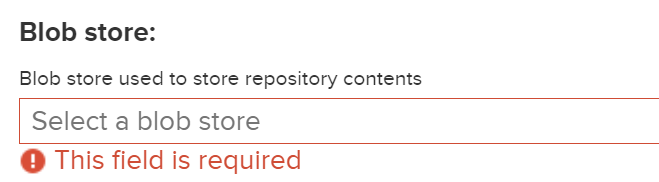
主要配置访问地址(仓库名称)、仓库的远程仓库地址和本地存储设置。
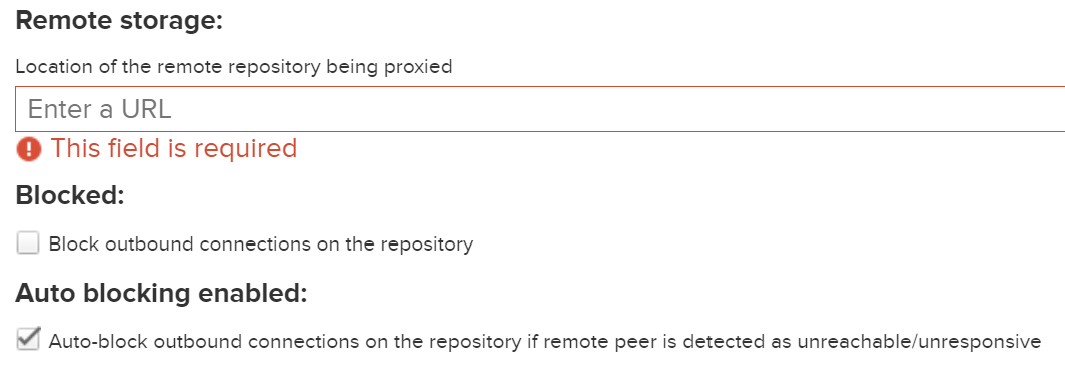
Blocked:阻止从远程仓库获取内容,适用于服务无法访问网络的情况以避免产生无效的网络请求。
pypi代理
Name="pypi-proxy"
Remote="https://pypi.doubanio.com"  # 远端镜像去掉/simple后缀
URL="http://localhost:8081/repository/pypi-proxy/simple"
/simple是仓库下的索引目录,Nexus会为远端地址自动添加该后缀。
conda代理
Name="conda-pkgs"
Remote="https://mirror.sjtu.edu.cn/anaconda/pkgs"
URL="http://localhost:8081/repository/conda-pkgs[/main]" # 使用时去掉main后缀
Name="conda-cloud"
Remote="https://mirror.sjtu.edu.cn/anaconda/cloud"
URL="http://localhost:8081/repository/conda-cloud[/main]" # 使用时去掉main后缀
如果远程仓库中包含多个通道(如conda-forge和pytorch),则可将多个通道配置为一个代理仓库。配置condarc文件时,custom_channels对应的URL均为上述代理访问URL。
maven代理
Name="maven-central"
Remote="https://maven.aliyun.com/repository/central"
URL="http://localhost:8081/repository/maven-central/"
apt代理
需要为不同版本设置不同的代理仓库(在配置中要填写版本名称,如focal,jammy),不支持多个仓库合并为组。
Name="ubuntu-focal"
Remote="https://mirrors.tuna.tsinghua.edu.cn/ubuntu/"
URL="http://localhost:8081/repository/ubuntu-focal/"
Name="ubuntu-jammy"
Remote="https://mirrors.tuna.tsinghua.edu.cn/ubuntu/"
URL="http://localhost:8081/repository/ubuntu-jammy/"
yum代理
Name="yum-centos"
Remote="http://mirrors.aliyun.com/centos/"
# https://mirrors.tuna.tsinghua.edu.cn/{fedora|centos}
URL="http://localhost:8081/repository/yum-centos/"
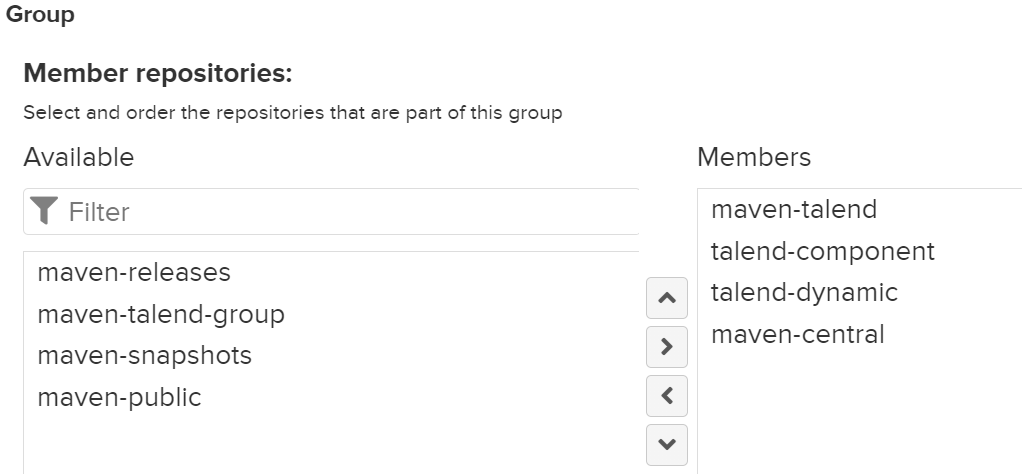
配置合并镜像源(group)
可从同一个地址获取多个仓库的内容(按顺序依次请求)。
Web服务目录与反向代理
设置Web服务目录:1) ==修改配置文件==。2)通过Web管理界面“System/Capabilities/Create capabilities”添加“Base URL”(http://addr_or_name:8081/prefix)。
client_max_body_size 1G;     # allow large uploads of files
proxy_max_temp_file_size 2G; # optimize downloading files larger than 1G
location /nexus {
  # Use IPv4 address to avoid IPv6 DNS lookup
  proxy_pass http://127.0.0.1:8081/nexus;
  proxy_set_header Host $host;
  proxy_set_header X-Real-IP $remote_addr;
  proxy_set_header X-Forwarded-For $proxy_add_x_forwarded_for;
  proxy_set_header X-Forwarded-Proto "https";  # If https terminated at nginx proxy
}